Execute a Simple HTTP/S Test
This example shows how a simple HTTP/S Test can be defined as a RealLoad ‘Test’ and executed as both a Load Test Job and a Monitoring Job.
The test sequence is manually entered into the HTTP Test Wizard to keep this example simple. However, you can also record HTTP/S tests using an HTTP/S Proxy Recorder and convert the recording into a HTTP Test Wizard session.
Pre-Requisites
To configure and execute a simple test you’ll need:
- Access to the RealLoad portal. If you haven’t signed up, do so first Sign Up
- Approx. 20..30 minutes of your time
- A cup of tea or coffee
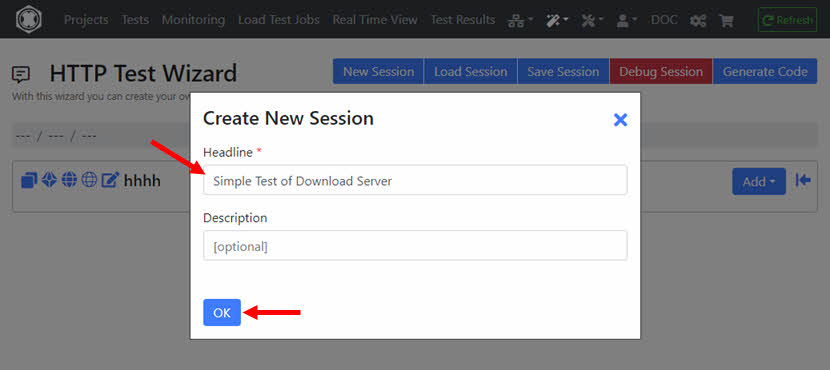
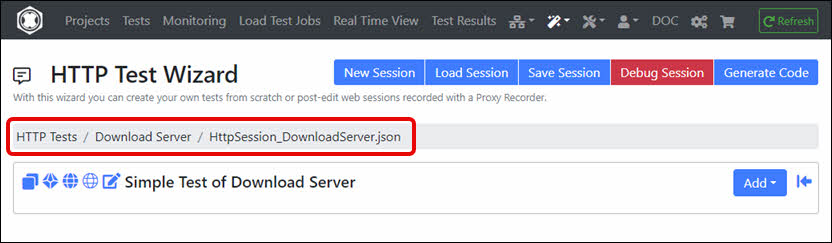
1. Invoke the HTTP Test Wizard and Create a New Session
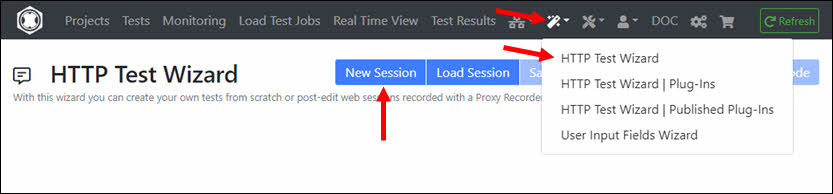
Enter the Headline that briefly describes what the test does.
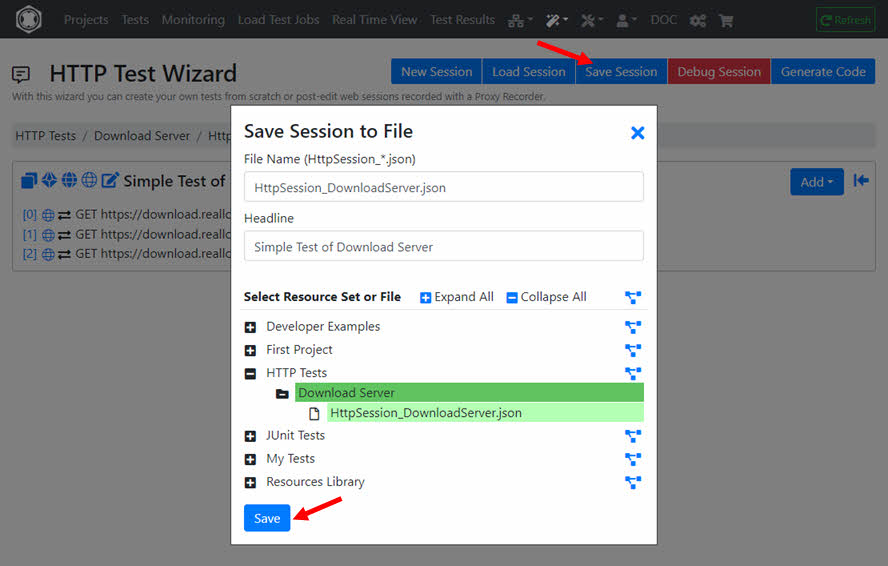
2. Save the (empty) Session
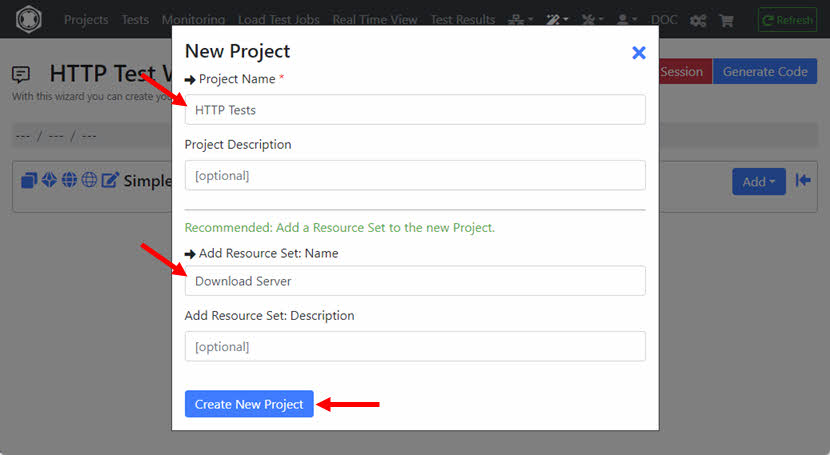
It’s best to save the empty session now. To do this, you must select a Resource Set of a Project. Alternatively, you can also create a new ‘Project’ and/or ‘Resource Set’. ‘Resource Sets’ are something like sub-directories of a Project, which contain all the files necessary to define and execute a test.

Enter the file name for the session, e.g. HttpSession_TestDownloadServer.json and save the session.
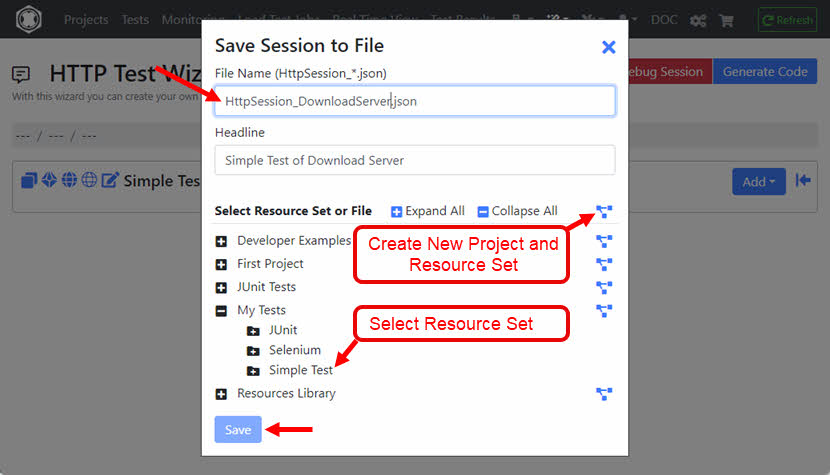
In this example, a new Project named ‘HTTP Tests’ is created which also contains a new Resource Set named ‘Download Server’.
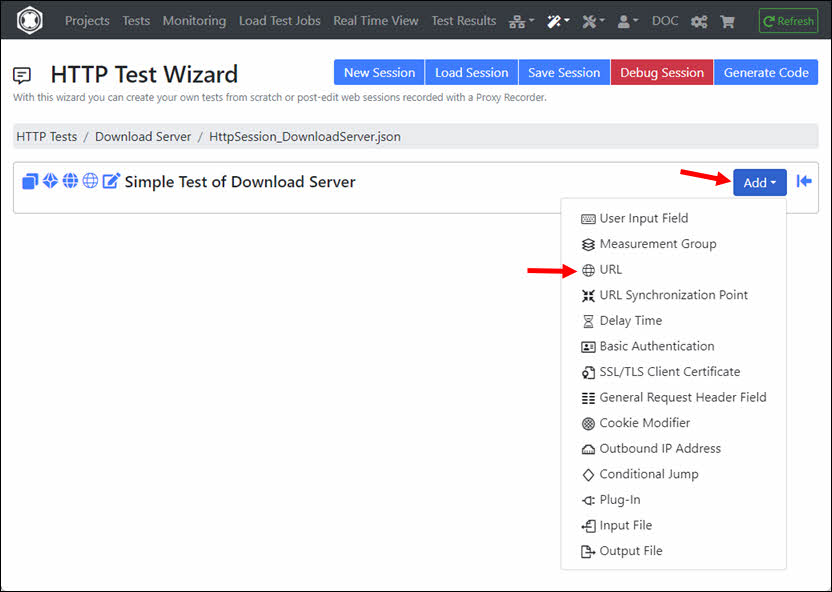
3. Add URLs to the Session
Click on the ‘Add’ dropdown and select ‘URL’.
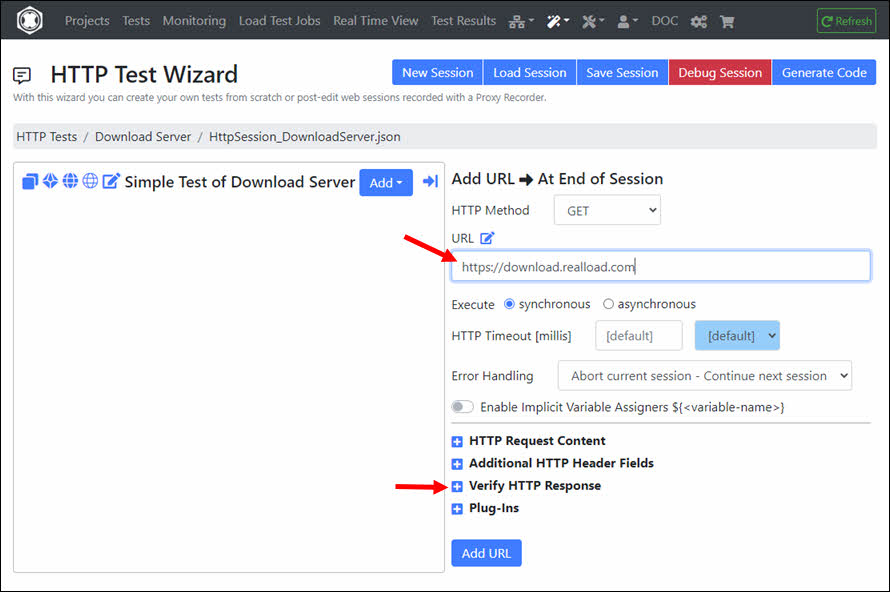
Enter the URL and click on the ‘+’ icon at ‘Verify HTTP Response’.
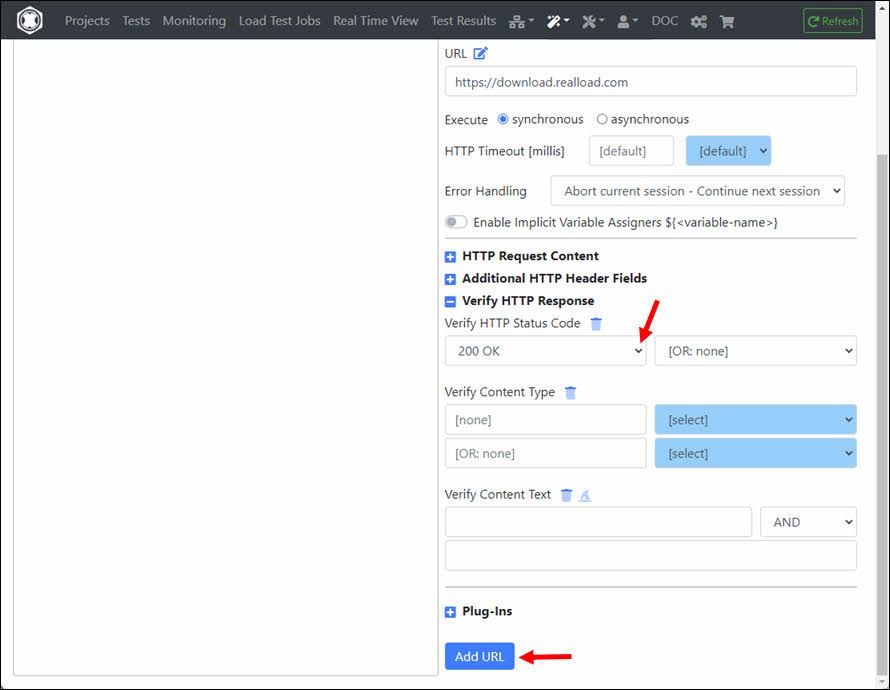
At ‘Verify HTTP Status Code’ select ‘200 OK’ and then click the ‘Add URL’ button.
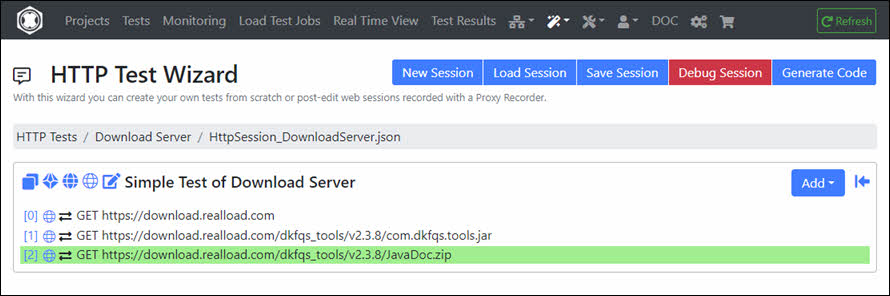
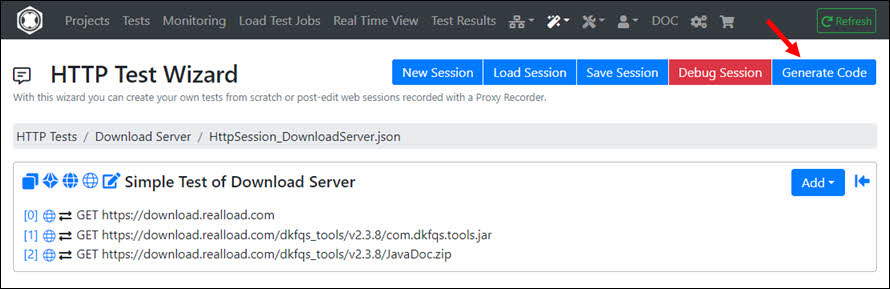
You can then add additional URLs to the session. In this example it looks like this:
4. Debug the Session
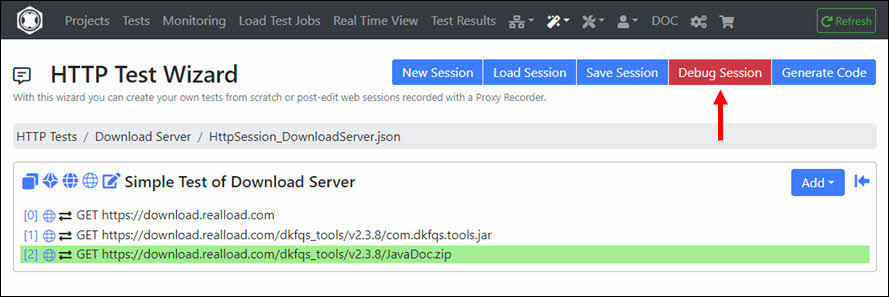
Before converting the session into a RealLoad ‘Test’ you should Debug the Session first. This way you can check whether all URL calls are working correctly. Click ‘Debug Session’.
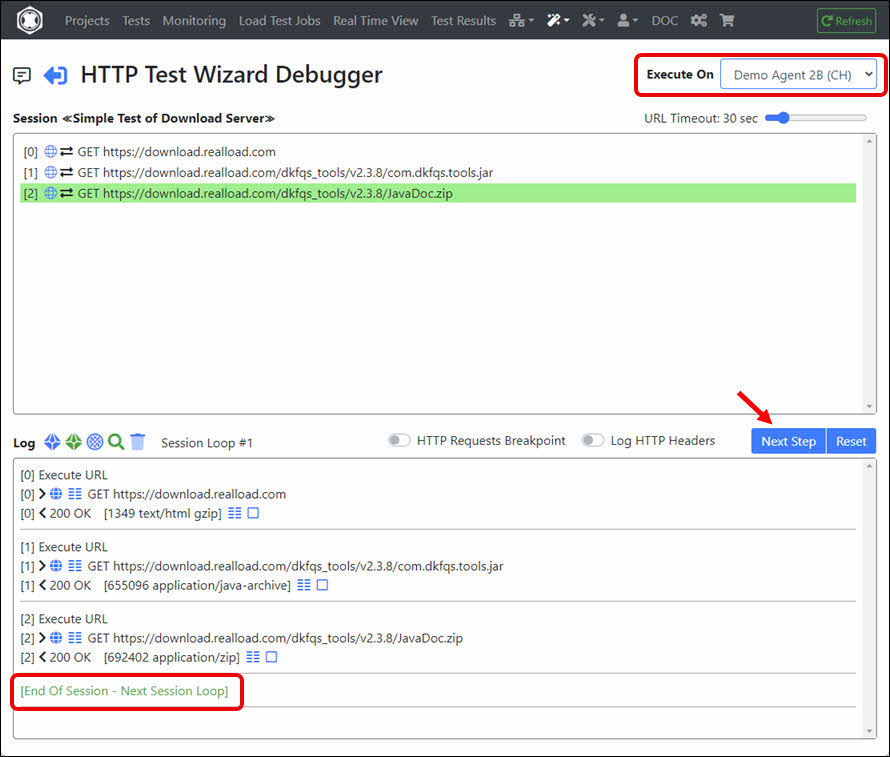
This invokes a powerful Remote Debugger that runs always on a Measuring Agent. As shown at the top right of the following image you can also select an alternative Measuring Agent on which the debugger will run.
In the debugger you can also extract values from HTTP responses and assign them to succeeding HTTP requests, whereby the session is automatically synchronized between the debugger and the HTTP Test Wizard.
In the debugger, click Next Step until all URLs have been executed successfully and the end of the session has been reached - or until an error occurs. If an error occurs, exit the debugger, then repair the URL (= HTTP/S request), and then invoke the debugger again.
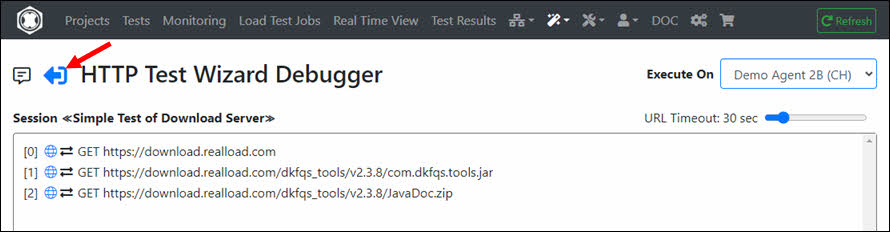
After debugging is successful, return to the HTTP Test Wizard.
5. Save the (debugged) Session
6. Generate and Compile the Code, and Define the RealLoad ‘Test’
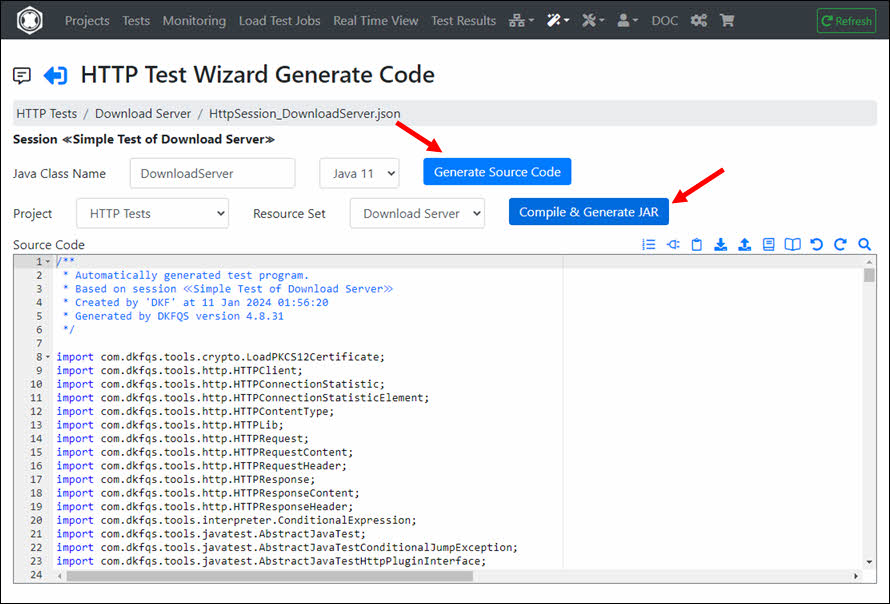
After the source code is compiled, click ‘Define New Test’.
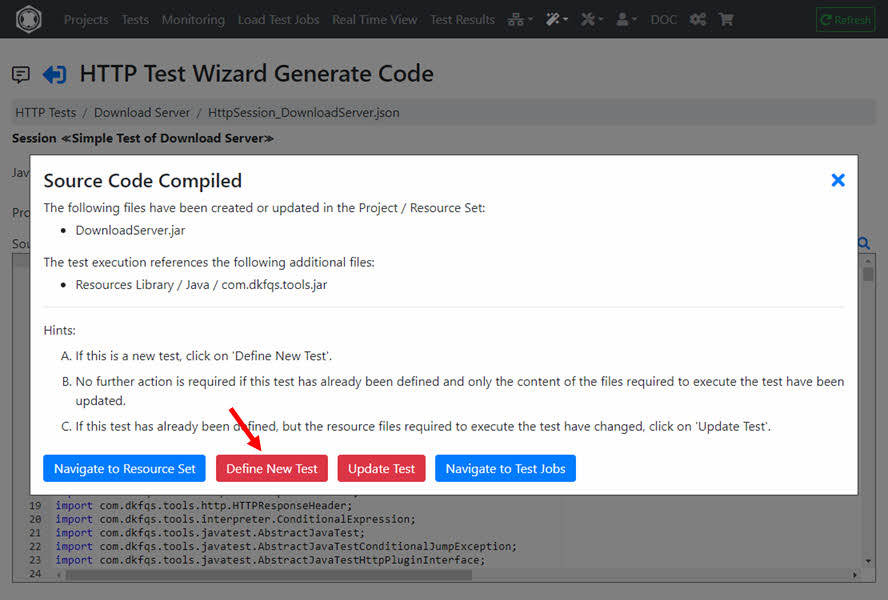
Enter the Test Description, and click ‘Define New Test’.
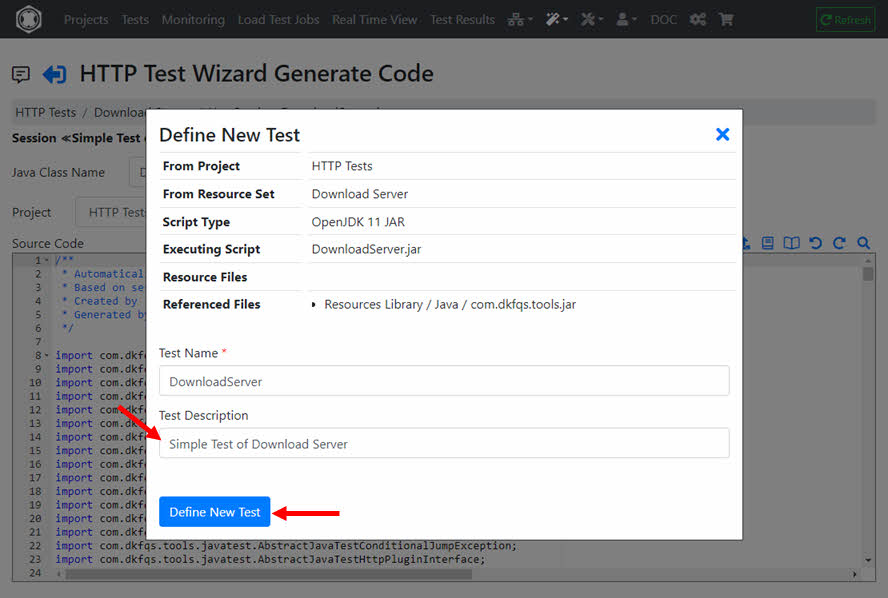
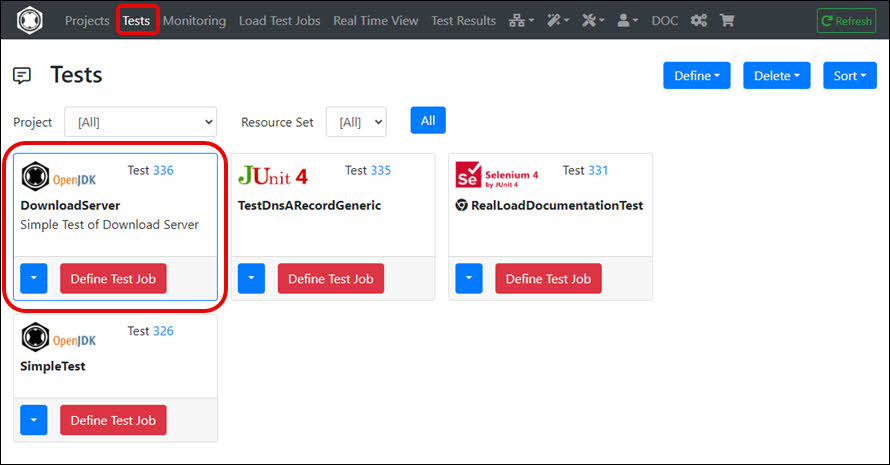
The RealLoad ‘Test’ is now defined. From here you can now create both a Load Test Job and a Monitoring Job.
Note: In case you (later) modify the session in the HTTP Test Wizard, you will have to generate and compile the source code again.
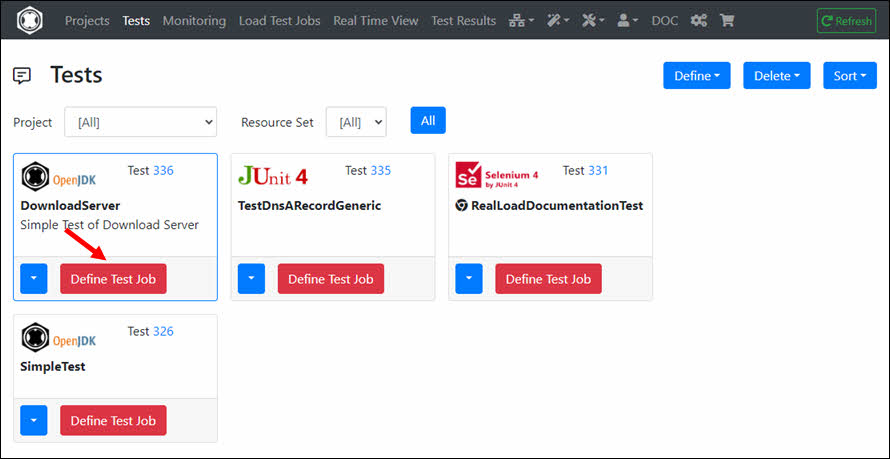
7. Define and Execute a Load Test Job
In the RealLoad ‘Test’ click ‘Define Test Job’.
In next menu click ‘Continue’ …
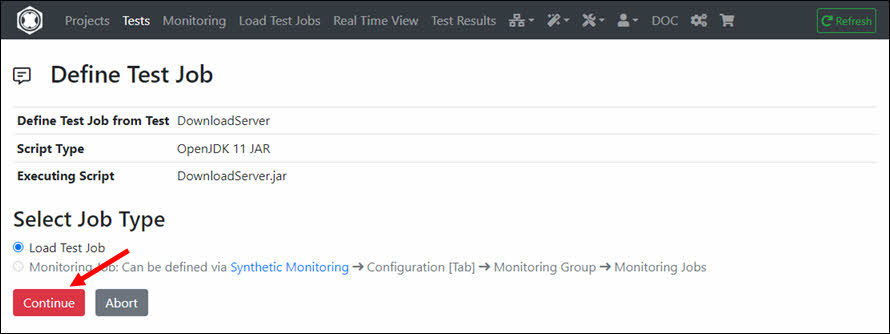
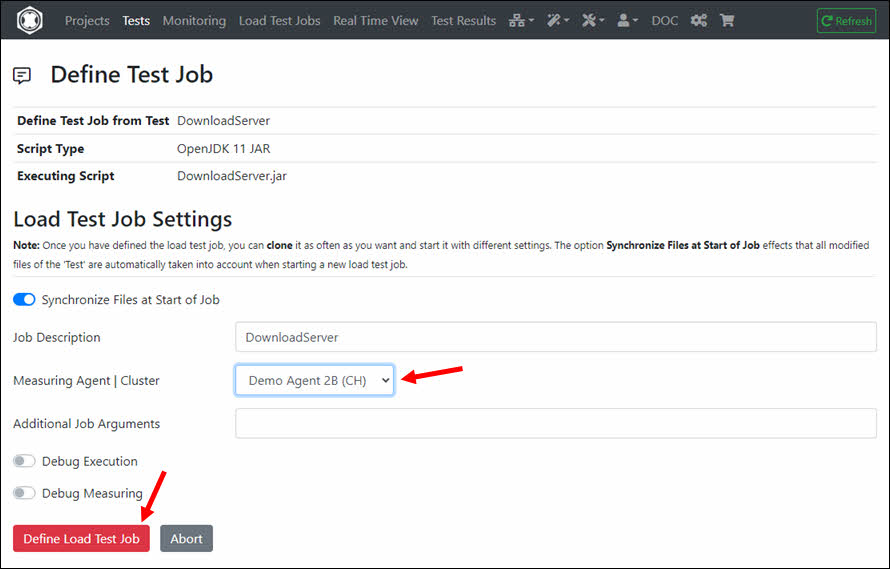
… And select the Measuring Agent on which the Load Test Job will be executed, then click ‘Define Load Test Job’.
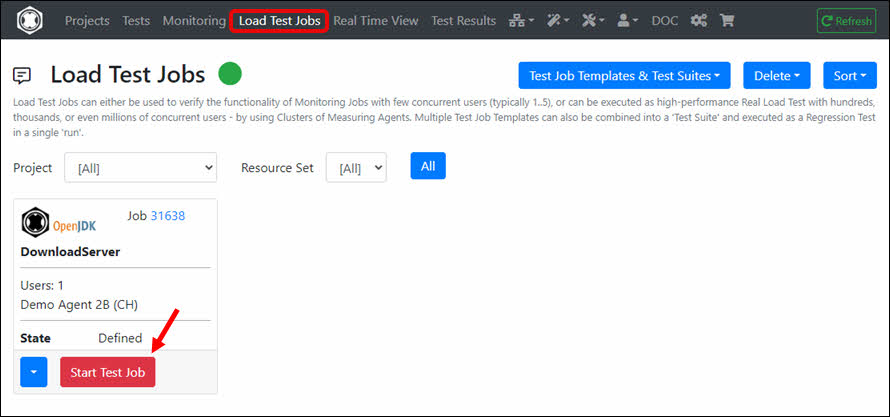
The Load Test Job is now defined. Click ‘Start Test Job’.
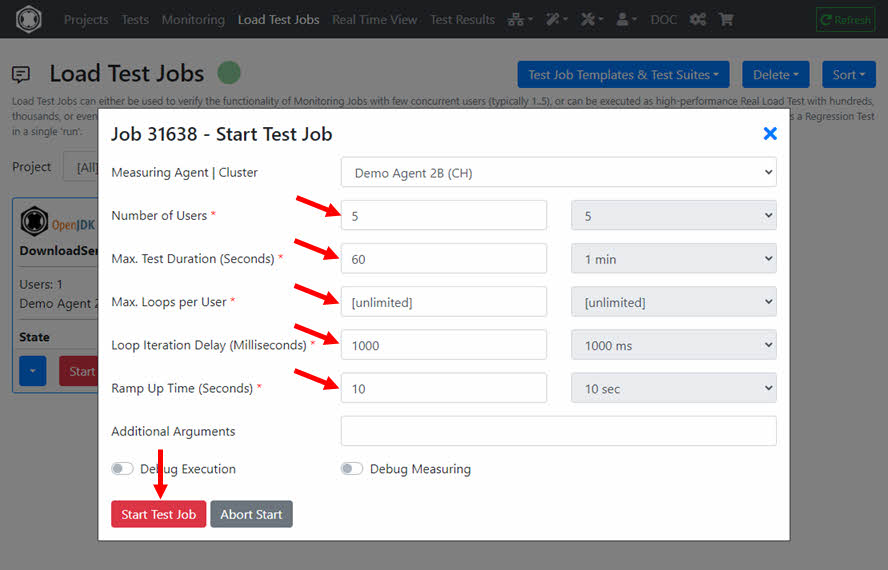
Enter the settings of the Load Test Job here and then click ‘Start Test Job’. We recommend the following settings for the first load test run:
- Number of Users: 5
- Max. Test Duration (Seconds): 60
- Max. Loops per User: [unlimited]
- Loop Iteration Delay (Milliseconds): 1000
- Ramp Up Time (Seconds): 10
Limitations if using a Free Account
A free account allows you to execute Load Tests with the following limitations ¹ :
- Max. Load Test Job runs per 24 hours: 12
- Max. Number of (virtual) Users: 50
- Max. Test Duration: 15 Minutes / 900 Seconds
¹ = Does not apply for Load Test Jobs executed on Measuring Agents launched by Cloud Credits: in this case there are no such restrictions.
You can add a Real Load license to your account at any time by purchasing it in our shop https://shop.realload.com .
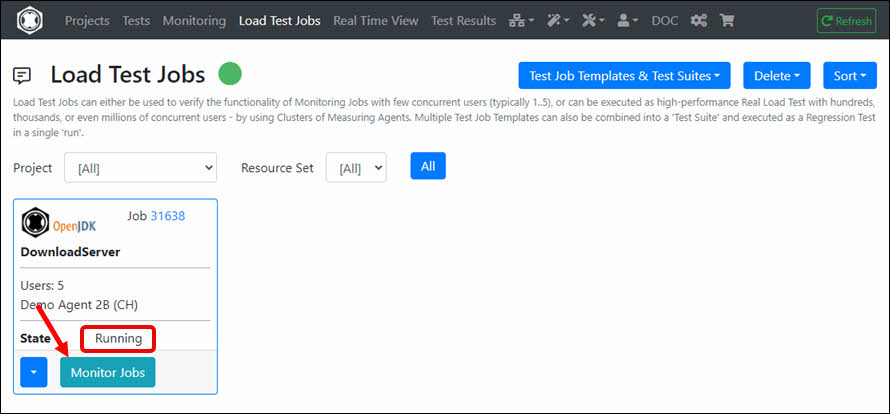
After a few seconds the Load Test Job is in the state ‘Running’. Click ‘Monitor Jobs’.
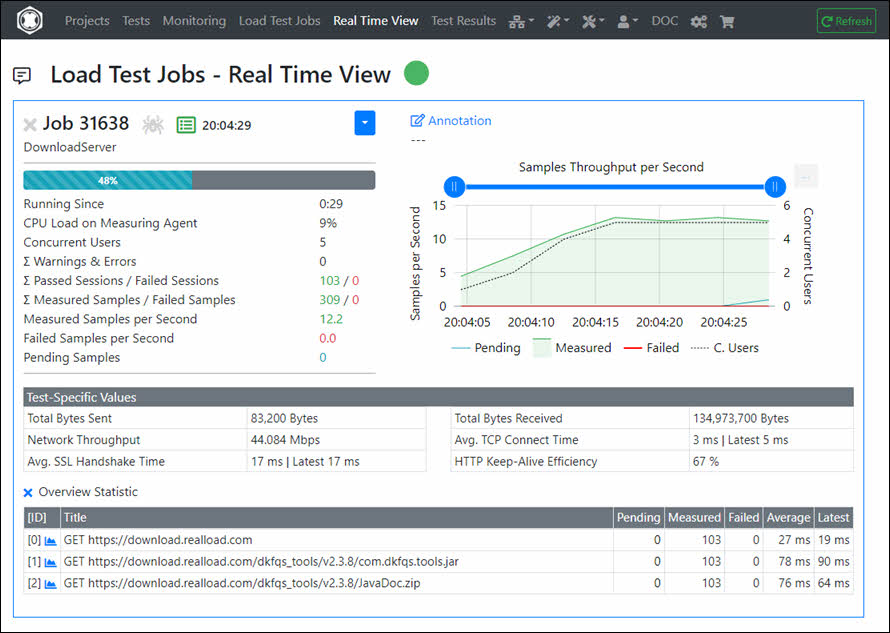
The real-time data of the running Load Test Job is now displayed.
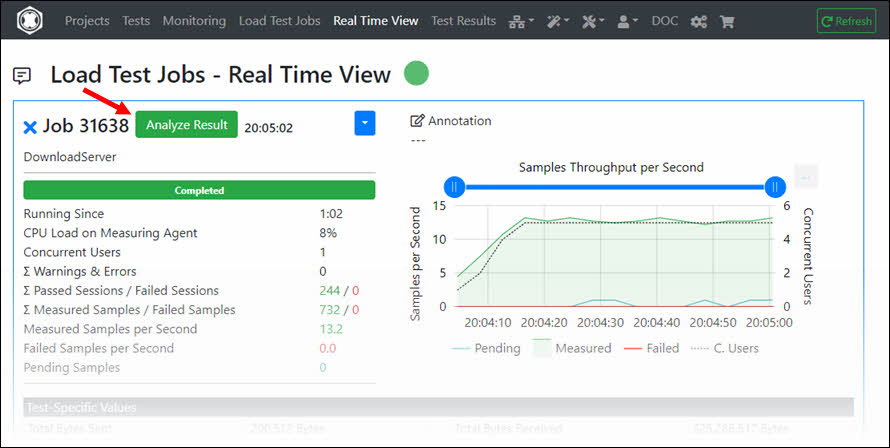
Click on ‘Analyze Result’ after the Load Test Job is completed.
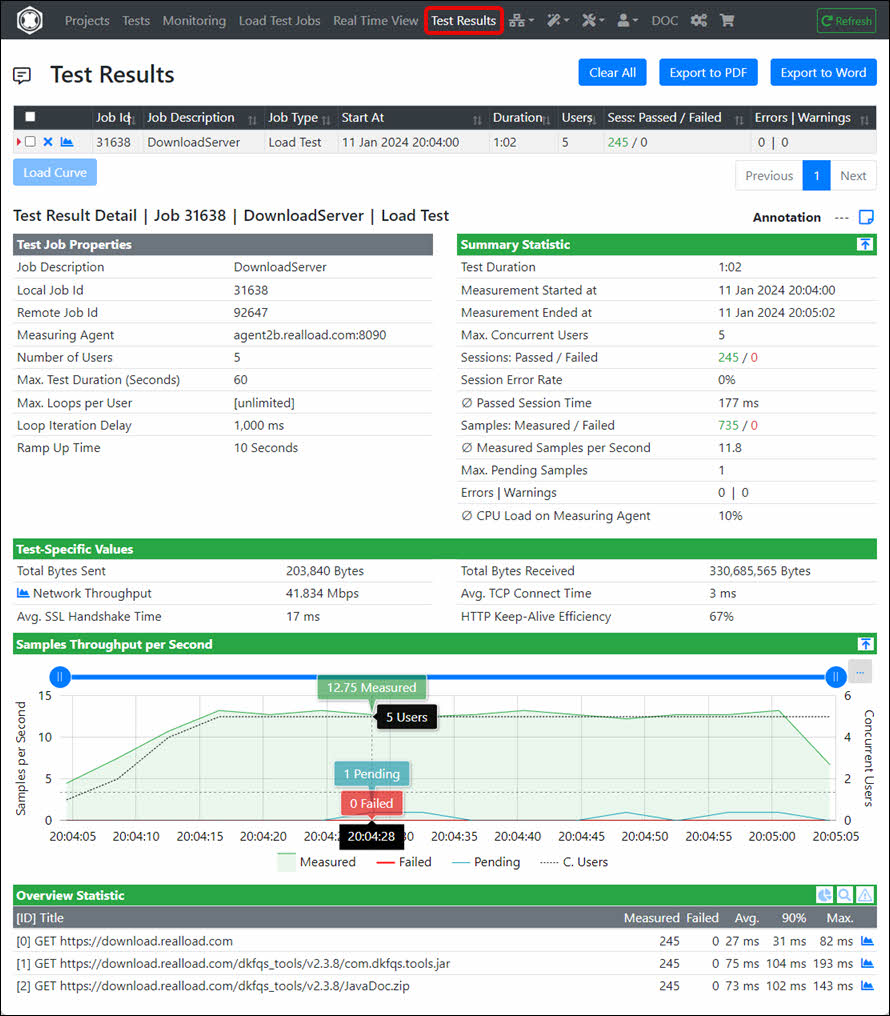
The Load Test Job result is then displayed.
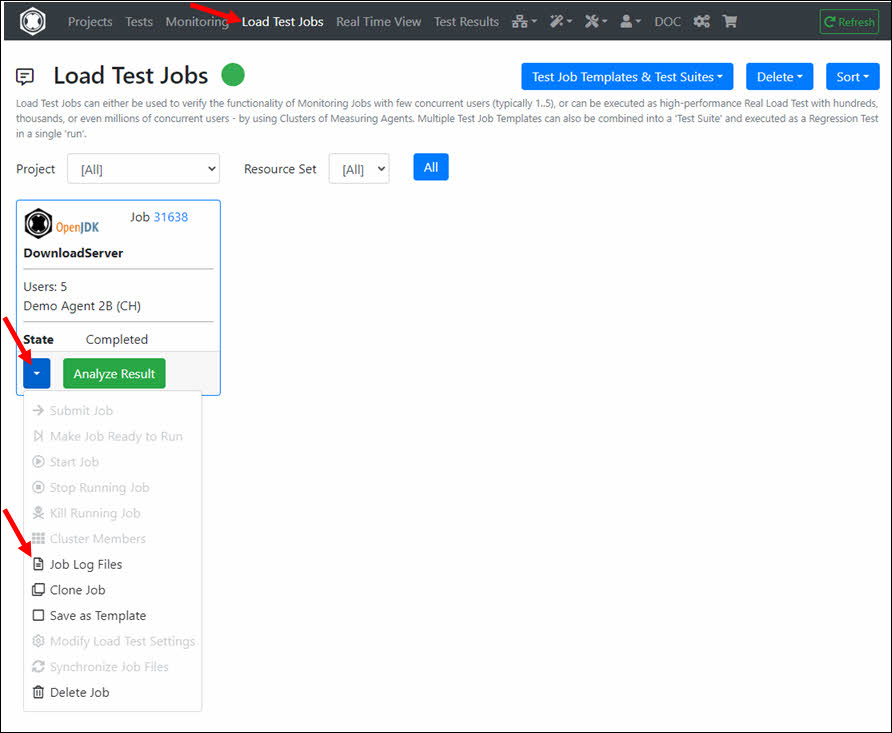
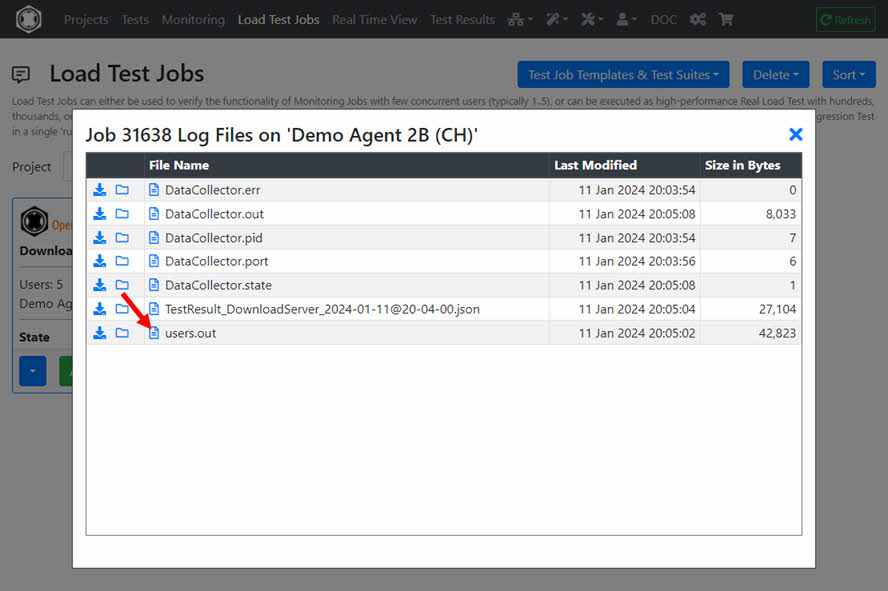
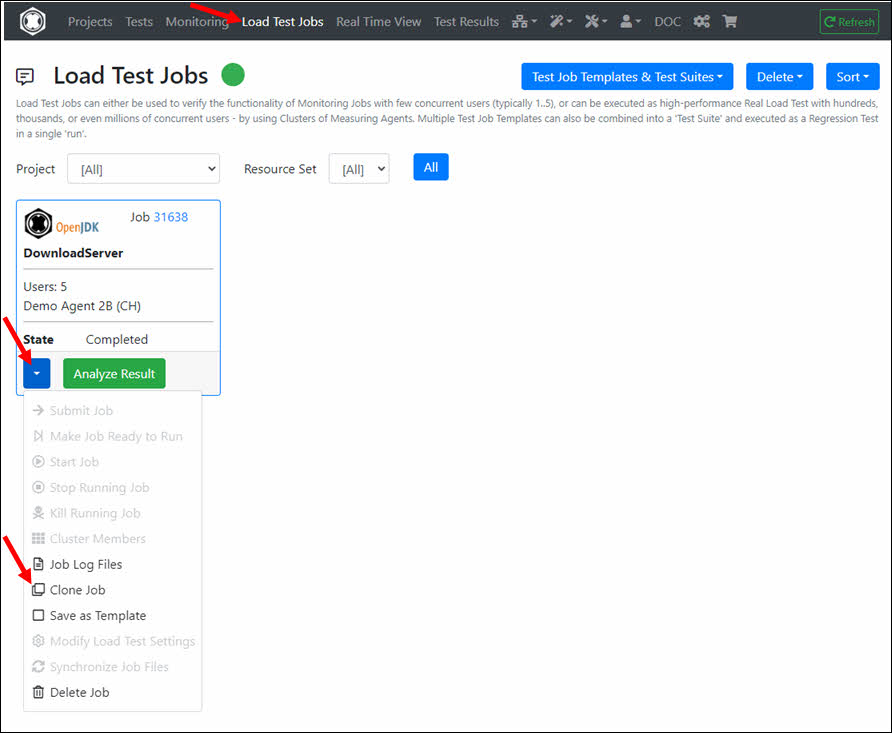
To view the Job Output Files navigate to ‘Load Test Jobs’ and click in the dropdown of the Job on ‘Job Log Files’.
Select the file users.out which contains the Log Output of the Job.
If you would like to run the Load Test Job again with the same or changed settings, click on ‘Clone Job’ in the Job dropdown and then start the cloned job.
8. Define a Monitoring Job
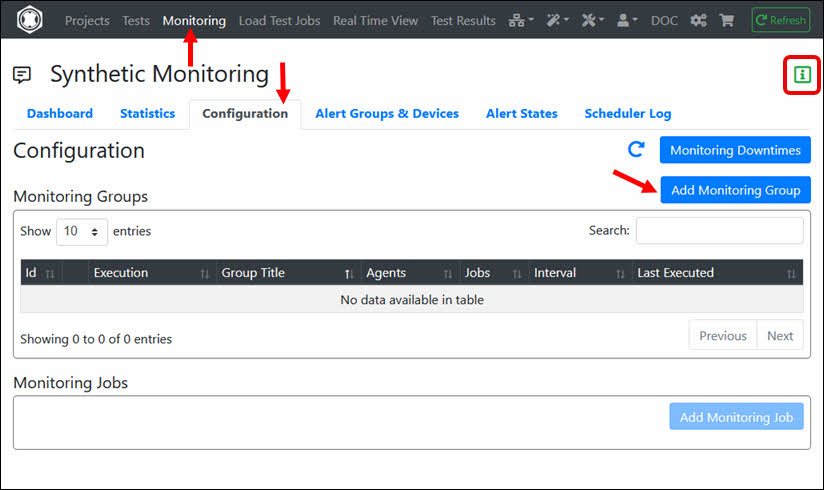
If this is your first Monitoring Job, you must first create a Monitoring Group. Navigate to Monitoring, click the ‘Configuration’ tab and then click ‘Add Monitoring Group’. There is also a help available for configuring the Synthetic Monitoring.
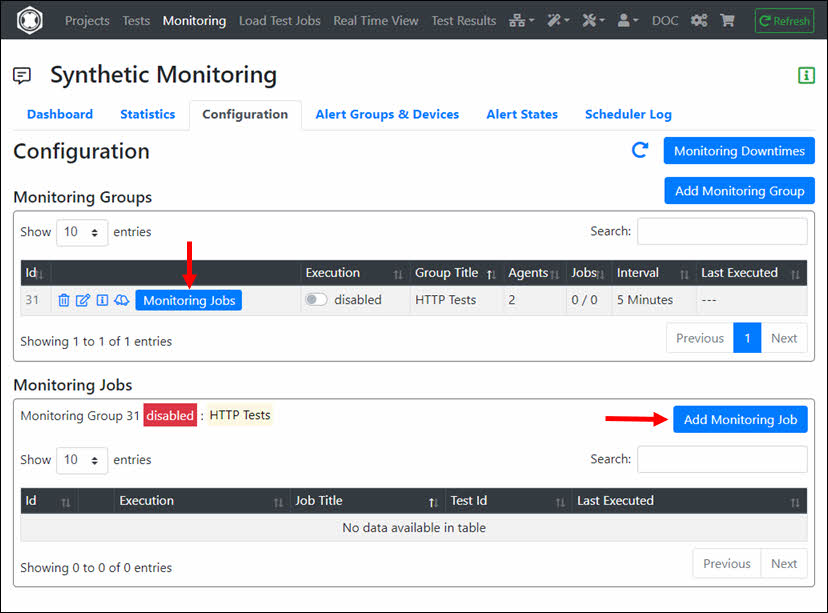
Enter the ‘Group Title’ and select at least one ‘Measuring Agent’ on which the Monitoring Job(s) will be executed. Then click ‘Add Monitoring Group’.

In the ‘Monitoring Group’ click ‘Monitoring Jobs’ and then click ‘Add Monitoring Job’.
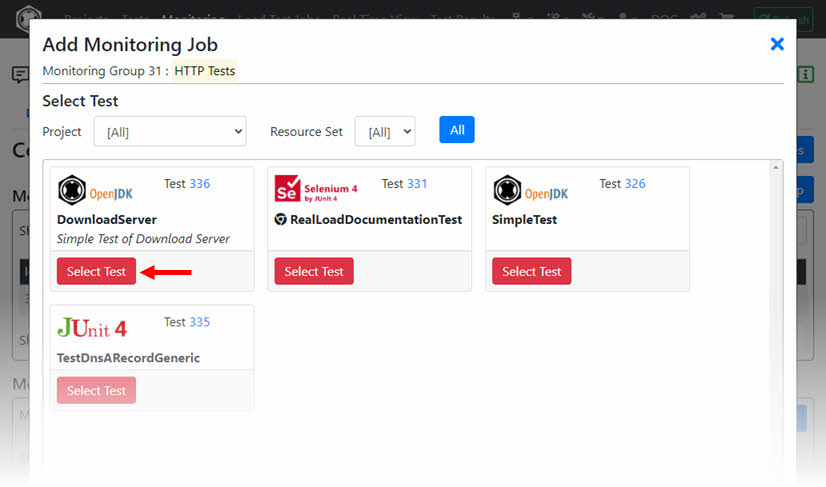
Select the ‘Test’ of the Monitoring Job.
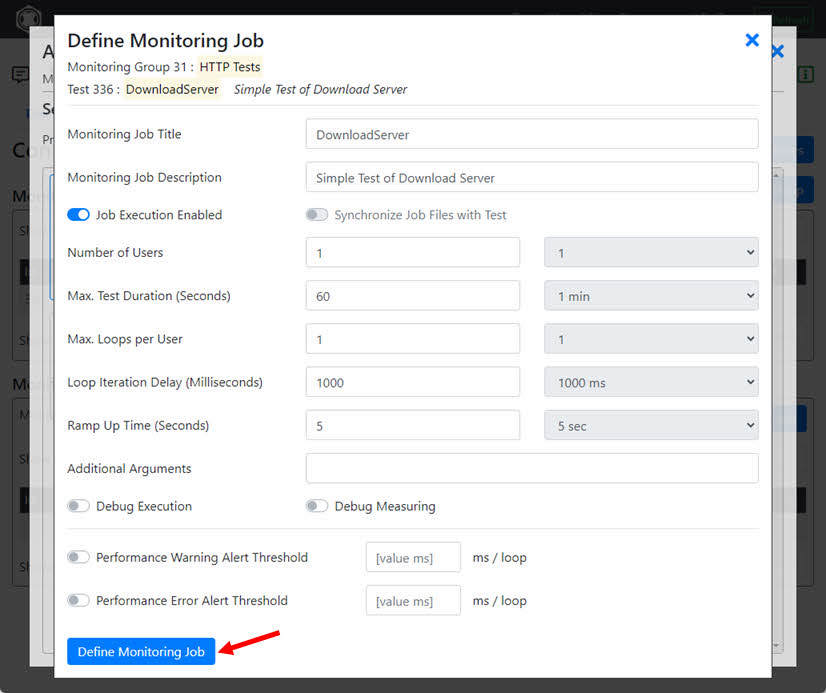
Click ‘Define Monitoring Job’.
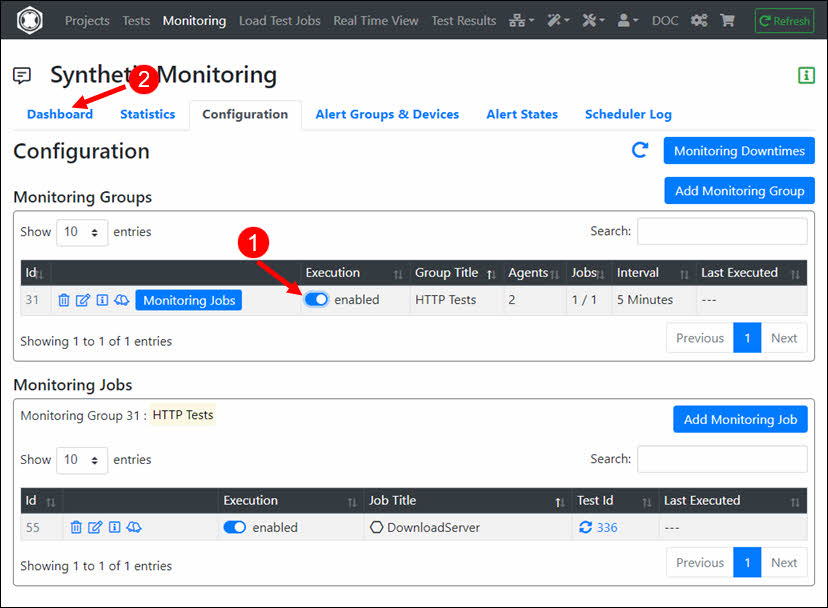
Enable the execution of the Monitoring Group and navigate to ‘Dashboard’.
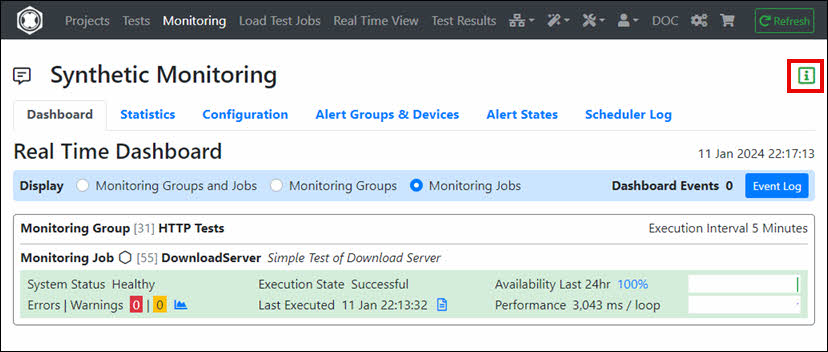
The Monitoring Job is now defined and will be executed periodically. For additional help configuring monitoring (e.g. adding ‘Alert Devices’), see Monitoring Help.
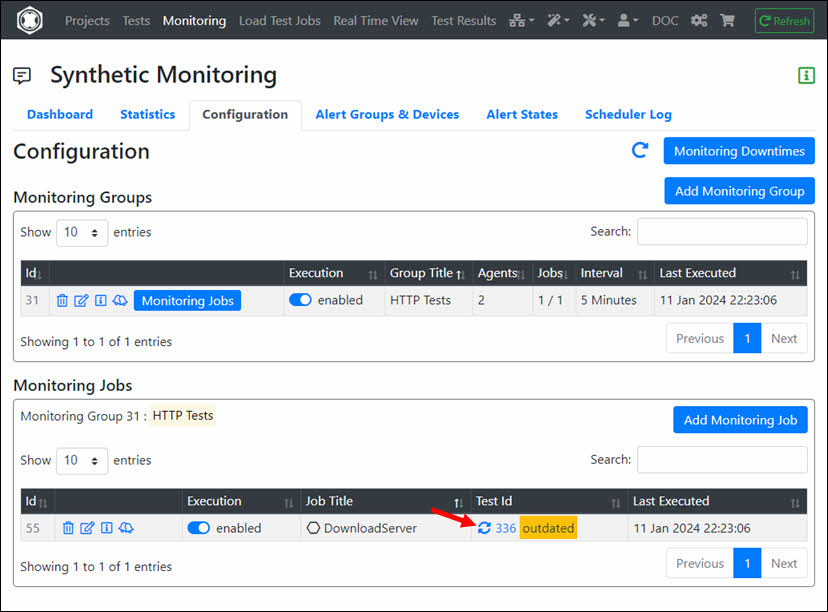
Tip: If you modify the RealLoad ‘Test’, the corresponding Monitoring Job is not automatically updated to avoid unexpected corruption of the Monitoring Job. After you have verified the modified ‘Test’ by running a small Load Test Job, you must manually update the Monitoring Job.
Done, congrats, you’ve run your first test with Real Load.
9. Conclusion and Prospects
As you have seen, a RealLoad Test can be run as both a Load Test Job and a Monitoring Job.
This example was deliberately kept simple so that you can become familiar with the RealLoad product. To create a test with a web browser session across multiple web pages, you can use a Remote Proxy Recorder to record the test case and then convert the recording into an HTTP Test Wizard session.
Additionally, a Test Job Template can also be defined from any ‘Load Test Job’, which can then be part of a Test Suite. This means that you can add multiple ‘Test Job Templates’ to a Test Suite and execute them in a single run as a Regression Test.
To learn more, we recommend you read the User Guide. There you will find detailed documentation on the steps described in this document.