HTTP/S Remote Proxy Recorder

By using an HTTP/S Remote Proxy Recorder, the HTTP/S traffic from Web browsers and technical Web clients can be recorded and easily converted into a HTTP Test Wizard session.
The HTTP Test Wizard session can then be post-processed and debugged. Finally, an executable test can be generated from the recorded session.
If you do not operate your own HTTP/S Remote Proxy Recorder (or have us to operate it), a shared HTTP/S Remote Proxy Recorder from our pool will be assigned to you, which will be available temporarily to you, as long as you are logged into the portal. This means that when you log out and log back into the portal, a different shared HTTP/S Remote Proxy Recorder may be assigned to you.
Alternatively, you can install the Desktop Companion application on your computer. This application also has an integrated HTTP/S Proxy Recorder which has roughly the same functionality as a HTTP/S Remote Proxy Recorder.
Functional Overview: Remote Proxy Recorder
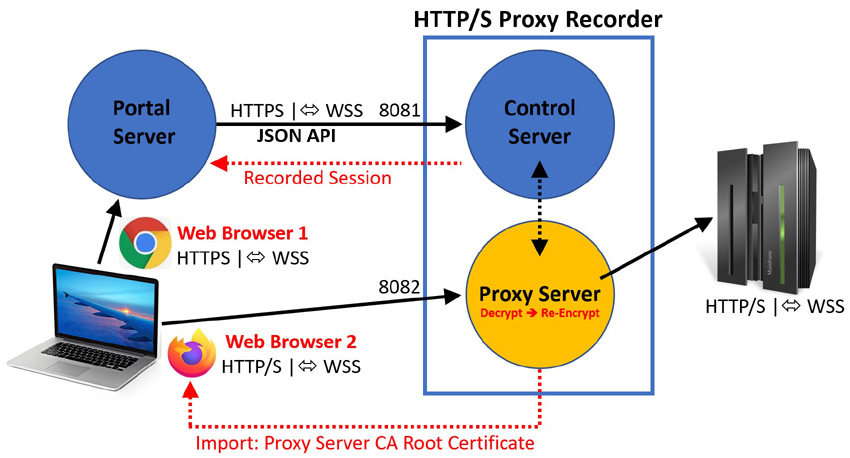
An HTTP/S Remote Proxy Recorder has two service ports:
- A Control Port that is addressed by the portal server.
- A Proxy Port that records the data traffic from a Web browser or from a technical Web client.
All data traffic that passes through the proxy port is first decrypted by the Proxy Recorder and then encrypted again before it is forwarded to the target Web server(s).
In order to record a Web surfing session by a Web browser you have to start two different Web browser products on your local machine. For example:
- A Chrome browser to operate the portal server (Web Browser 1), and
- A Firefox browser to record the Web surfing session (Web Browser 2)
We recommend to use always Firefox as Web Browser 2.
To be able to record a Web surfing session, you have to reconfigure Web Browser 2
- Import the Proxy Recorder CA Root Certificate into the Web Browser 2
- Configure the Network Settings of Web Browser 2 to use the Proxy Server, or alternatively (recommended) install the RealLoad Web Browser Extension in Web Browser 2.
Additional note: Before you start recording a Web surfing session in Web Browser 2, you must always clear the browser cache.
Once the recording is completed you should undo the configuration changes in Web Browser 2 (restore the original network settings and delete the Proxy Server CA Root Certificate).
Importing the Proxy Recorder CA Root Certificate into the Web Browser
The following describes how you can import the CA Root Certificate of a Proxy Recorder in the Firefox Web Browser.
Sign in to the portal, navigate to the HTTP/S Remote Proxy Recorders menu, and download the CA Root Certificate of the Proxy Recorder to any folder on your computer:

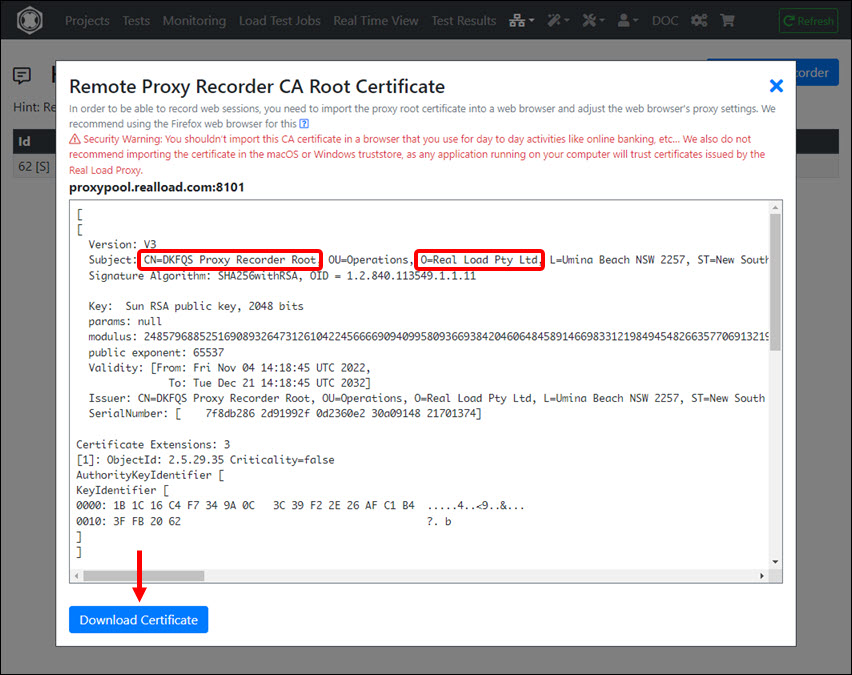
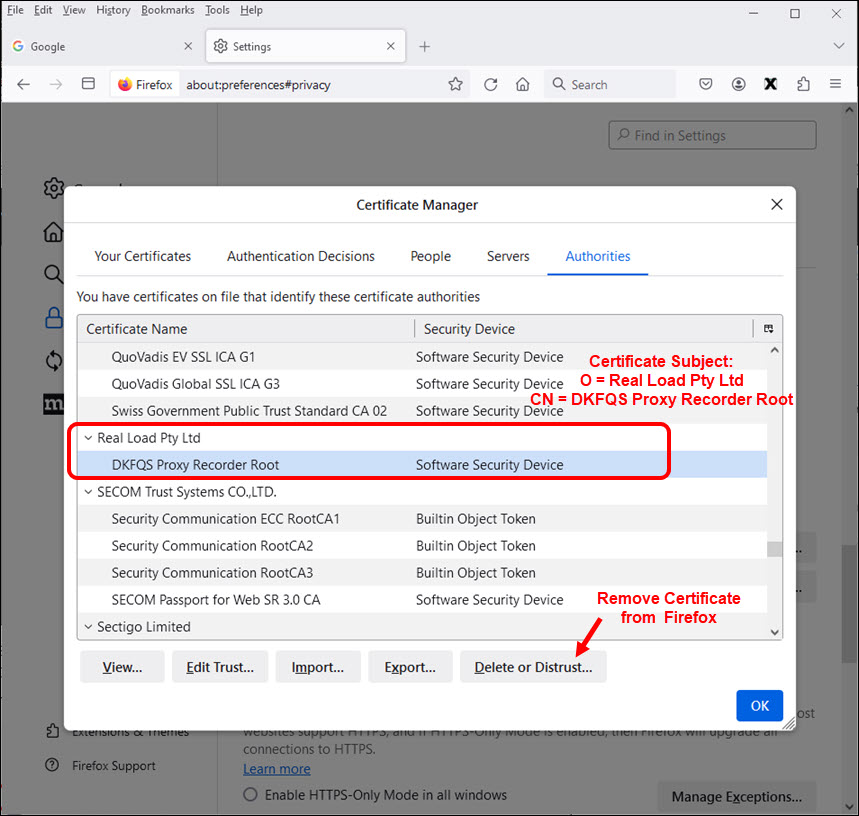
Note: The image above shows the certificate of a shared proxy recorder (whereby all shared proxy recorders use the same CA root certificate). However, the ‘Subject’ of the certificate could also have other values, depending on the proxy recorder. So that you can find the certificate in Firefox and delete it if necessary, you should remember the values of the ‘Certificate Subject’ (or take a photo of the certificate properties with your mobile phone).
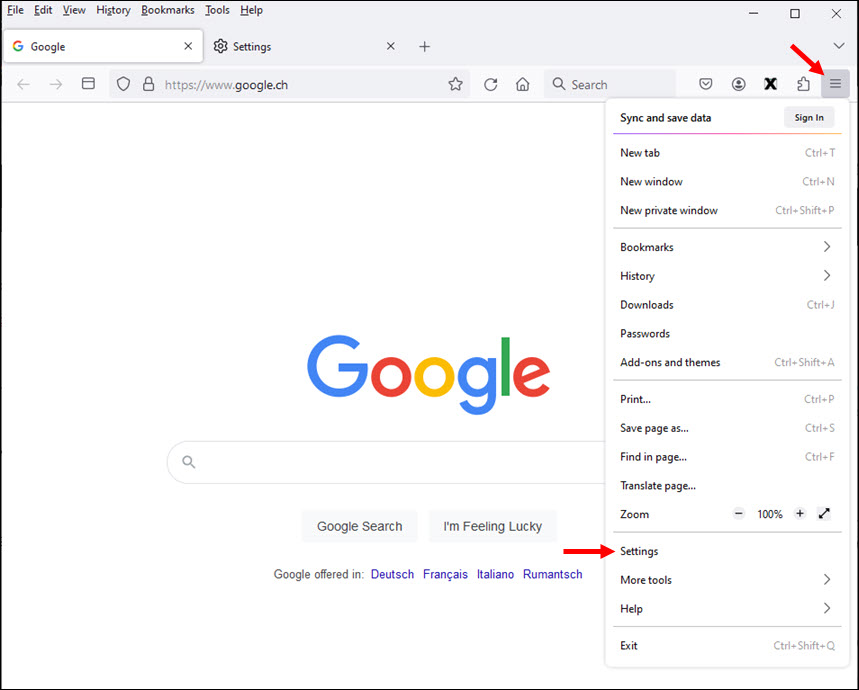
In Firefox call Settings:
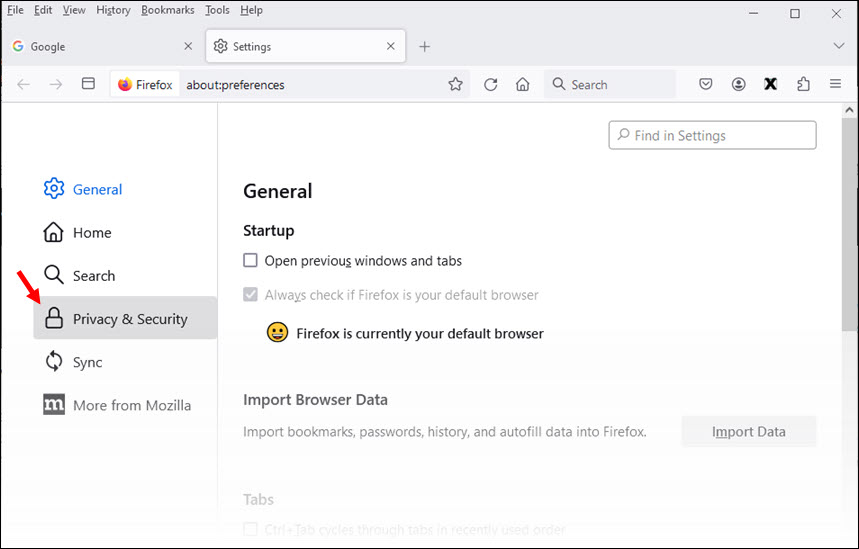
Click Privacy & Security:
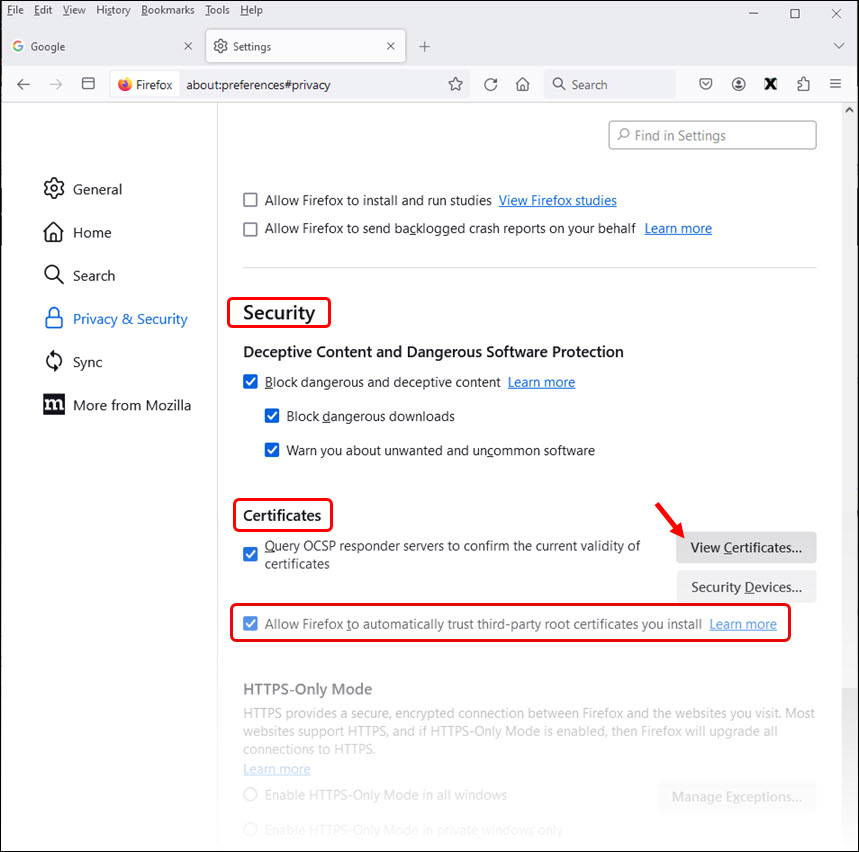
Scroll down to Security - Certificates, and click ‘View Certificates…’
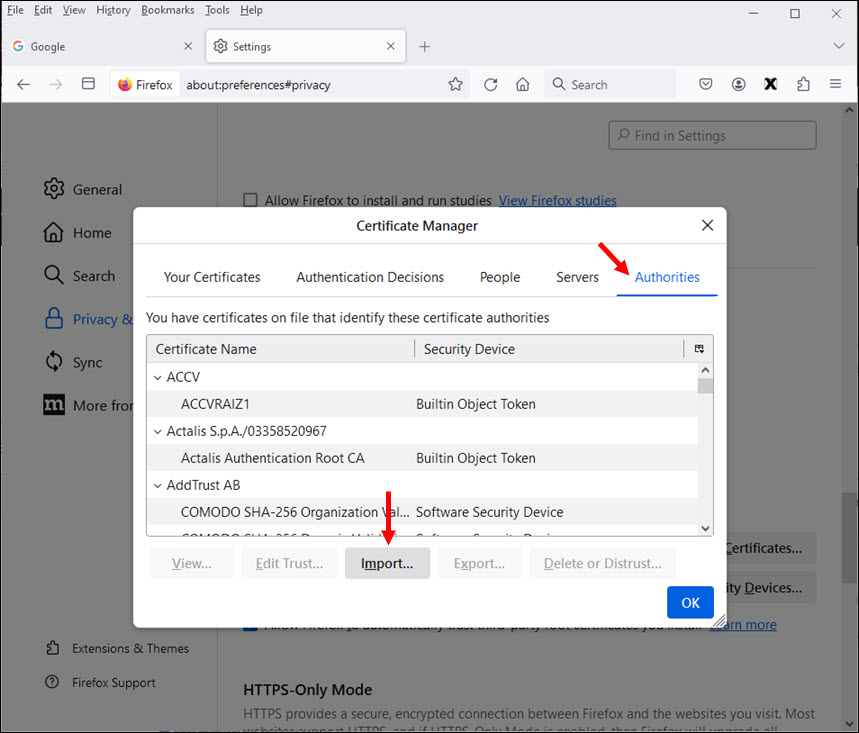
In the Firefox Certificate Manager click first on Authorities and then on ‘Import…’
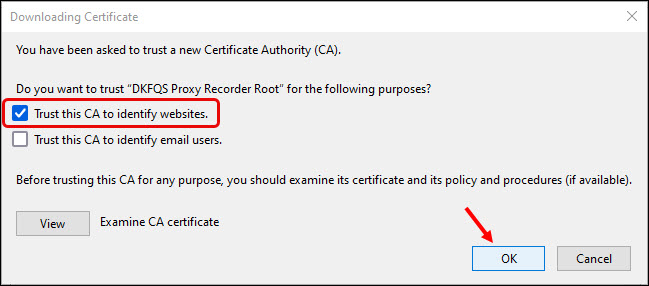
Select the CA Root Certificate you downloaded before and check the “Trust this CA to identify websites” box. Then click OK
The CA Root Certificate is now imported into Firefox:
Important Security Notice
After you have installed a Proxy Recorder’s CA Root Certificate in a web browser product (in this case, Firefox), you can record web surfing sessions, but you can no longer trust the web browser itself, because if someone else has accesses to the same CA Root Certificate, you can be cheated - without the corresponding web browser issuing a warning.
This is especially important if you use a Shared Proxy Recorder or the Desktop Companion application. This means that you should never use such a web browser for financial-critical transactions such as e-banking - or for logging into personal websites, as long as a proxy recorder’s CA root certificate is installed in the browser. Only after removing the CA root certificate from the browser is it safe again.
This security problem is not so critical if you operate your own HTTP/S Remote Proxy Recorder (or have us operate it). But even in this case, you could theoretically be cheated by your team members.
So the most secure way is to remove the proxy recorder’s CA root certificate from the web browser as soon as your recording is done.
Recording of Web Surfing Sessions
Once you have Imported the Proxy Recorder CA Root Certificate into the Web Browser and have installed the ‘RealLoad Test Recorder’ browser extension you are ready to Record Web Surfing Sessions and convert them into RealLoad Tests.