Recording of a Web Surfing Session
This document describes how a Web Surfing Session can be recorded by using a HTTP/S Remote Proxy Recorder and then post-processed in the HTTP Test Wizard. After post-processing, a RealLoad Test can be generated.
Preconditions
The following assumes that a Firefox web browser is used for recording and that the CA Root Certificate of the HTTP/S Remote Proxy Recorder has already been imported into Firefox.
You must also have the ‘RealLoad Test Recorder’ browser extension installed in Firefox. It is recommended to only turn on this browser extension when recording a Web Surfing Session.
Preparing Firefox for Recording
The following text describes how to copy and paste a HTTP/S Remote Proxy Recorder Configuration into the Firefox ‘RealLoad Test Recorder’ browser extension.
You now need two web browsers from different manufacturers:
- The Firefox browser
- A Chrome browser that is signed-in into the RealLoad portal
In Firefox navigate to Manage Extensions

At the RealLoad Test Recorder extension click Options
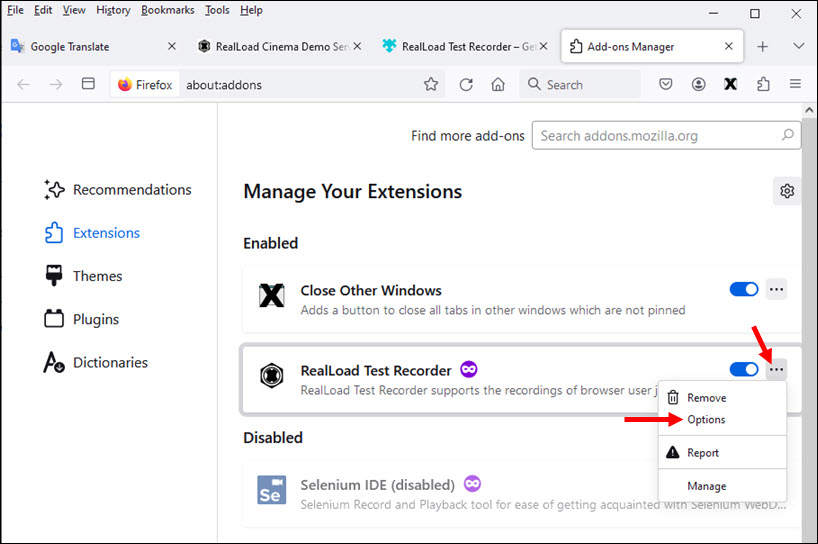
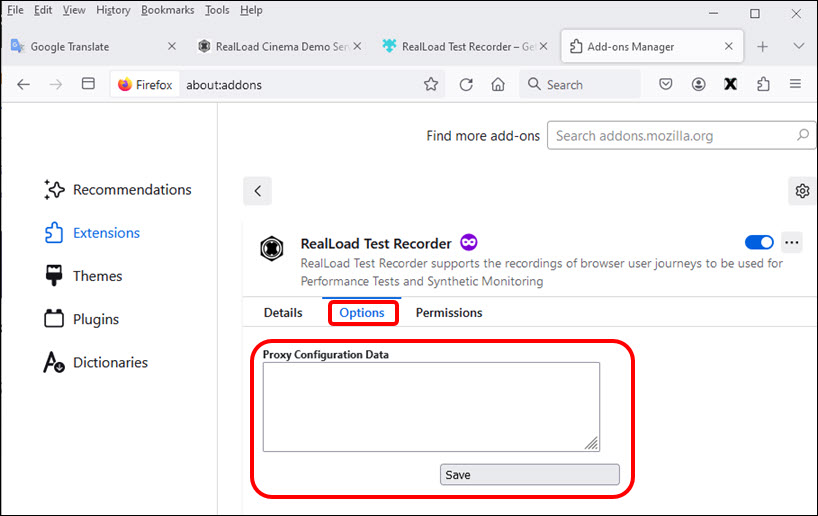
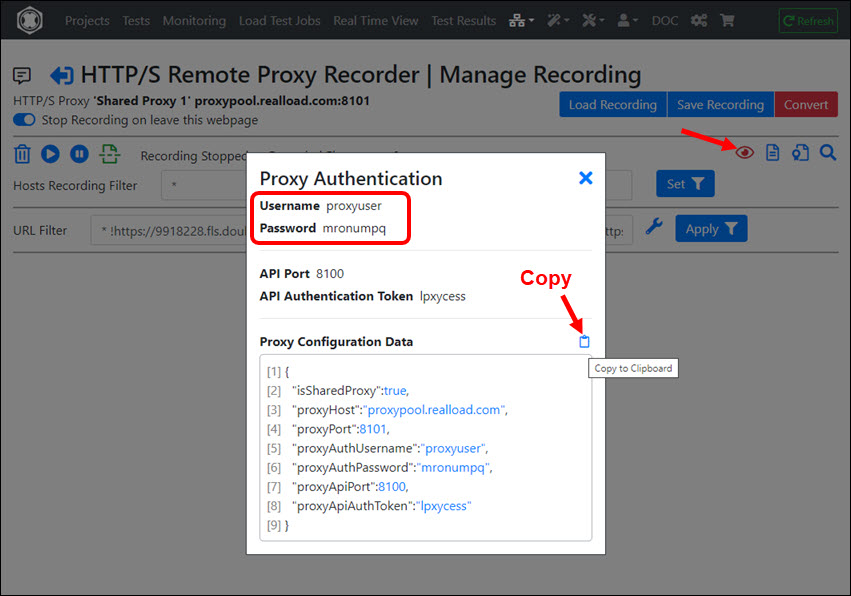
Now use the Chrome browser, sign in to the RealLoad portal, navigate to the HTTP/S Remote Proxy Recorders menu, and Connect to the Proxy Recorder

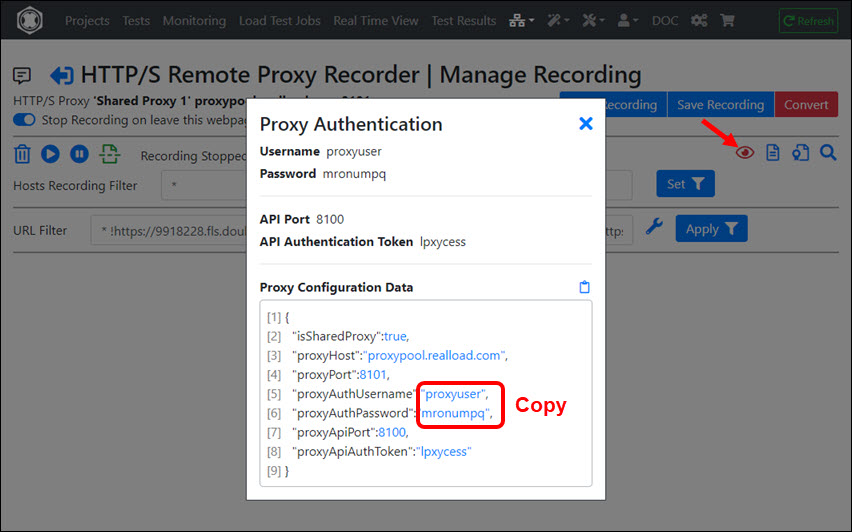
After you are connected to Proxy Recorder with the Chrome browser, click on the ‘Red Eye Icon’ and copy the ‘Proxy Configuration Data’ to the Clipboard by clicking the corresponding icon
Then paste the ‘Proxy Configuration Data’ to the Firefox ‘RealLoad Test Recorder’ browser extension and click ‘Save’
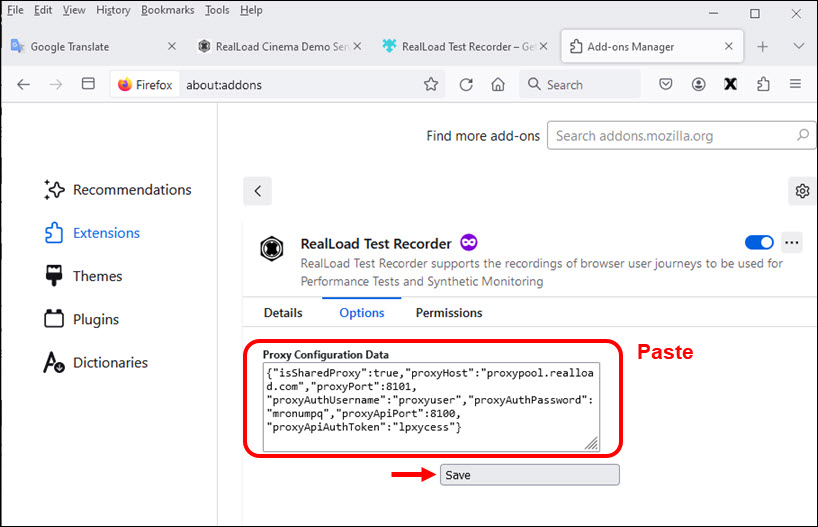
Firefox is now ready for recording.
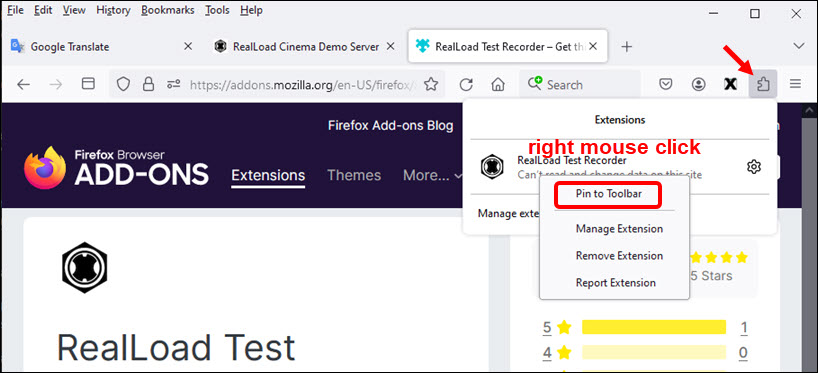
Tip: You can also Pin the ‘RealLoad Test Recorder’ browser extension to the Firefox Toolbar:

Recording a Web Surfing Session
The following example shows the recording of the purchase of a Cinema Voucher in the RealLoad Cinema Demo Shop.
cinema.realload.com is a public server available to you for educational purposes.
In the Chrome browser connect via portal to the Proxy Recorder and click on the ‘Red Eye Icon’:
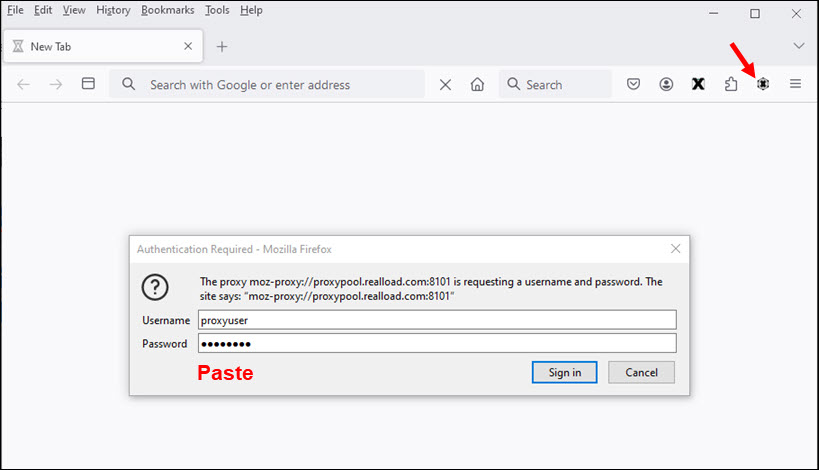
In Firefox click the ‘RealLoad Test Recorder’ browser extension. When you are asked for the Proxy Authentication then paste the username and password shown in Chrome.
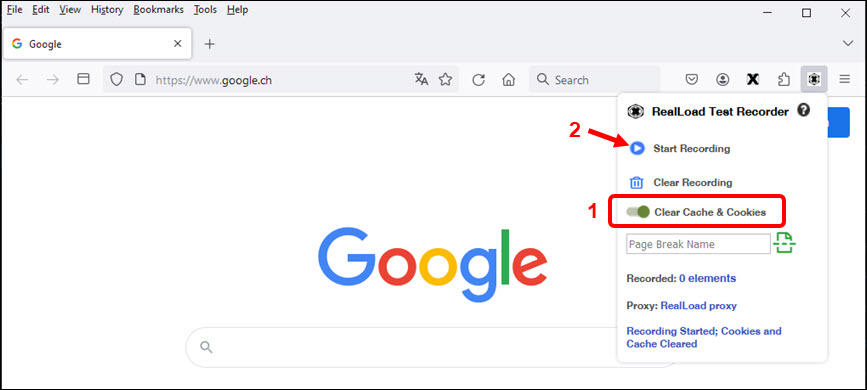
In the ‘RealLoad Test Recorder’ browser extension first enable Clear Cache & Cookies and then click Start Recording
In Firefox enter the URL https://cinema.realload.com/shop which is the starting point of the recorded session.
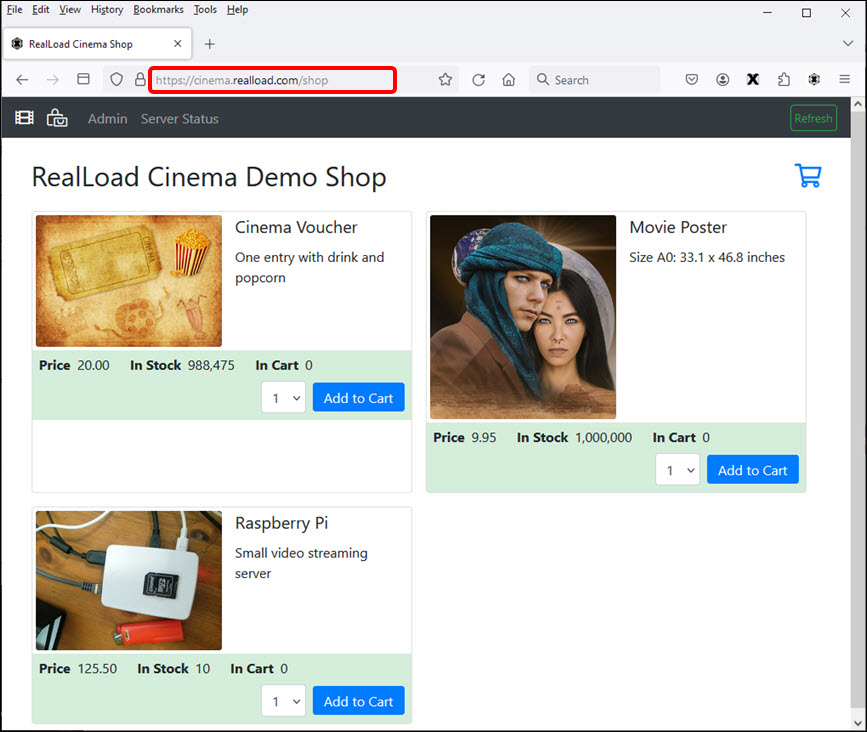
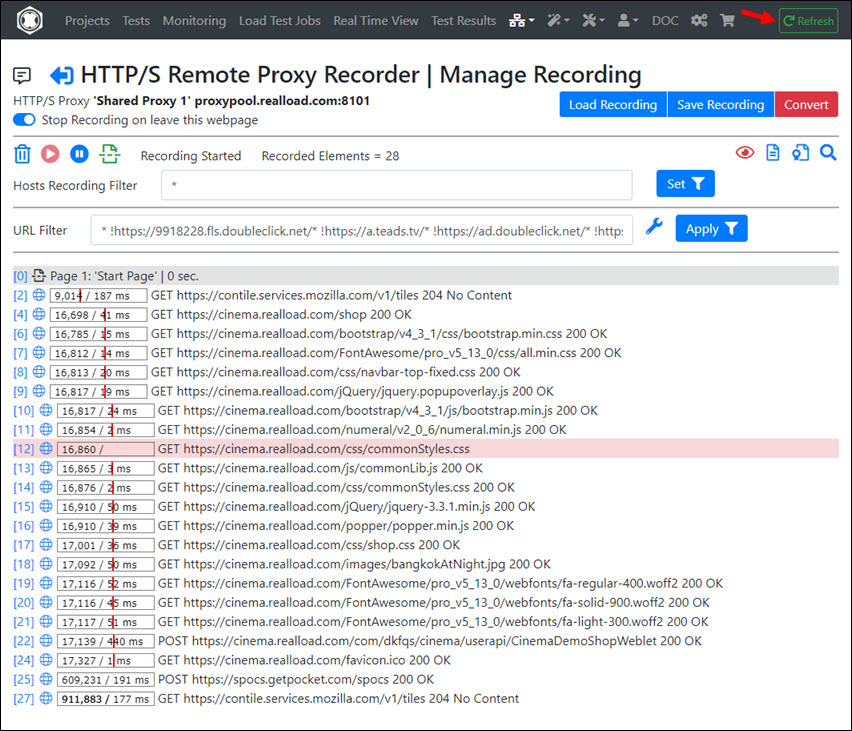
Optional: Have a look at Chrome and you will see that the first web page is recorded:
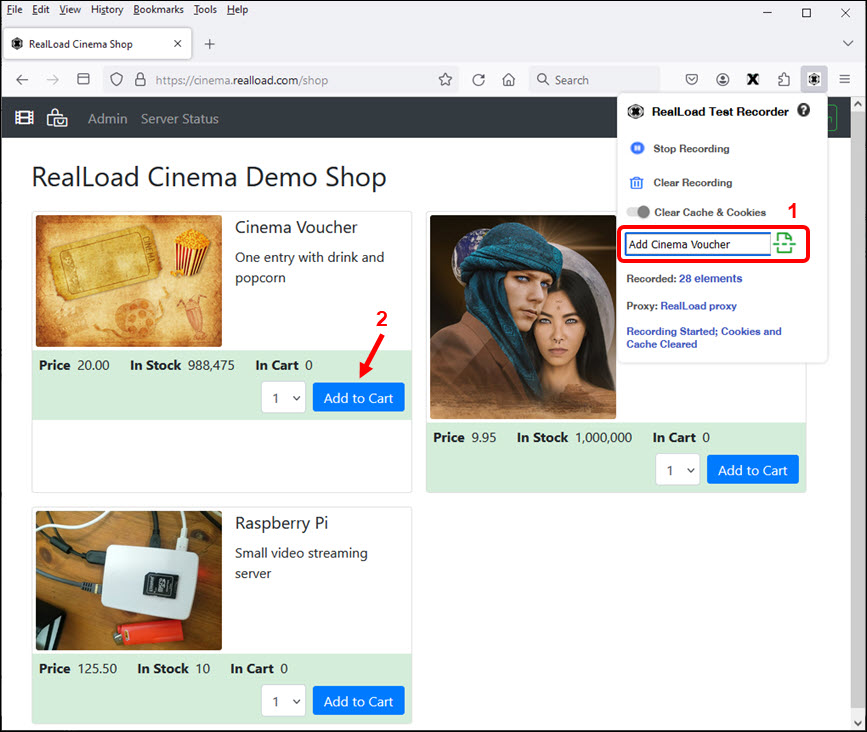
A cinema voucher will now be added to the shopping cart. In Firefox first insert a ‘Page Break’ with the comment ‘Add Cinema Voucher’, and then click on ‘Add to Chart’ in the shop:
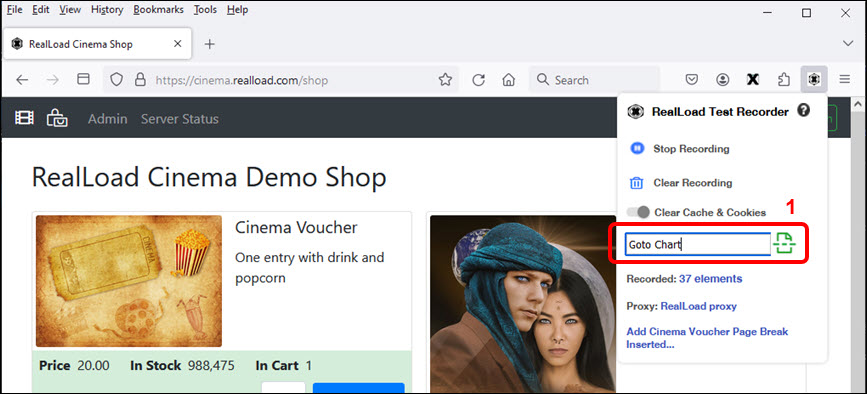
Add another Page Break with the comment ‘Goto Chart’, and then click the Cart Icon:
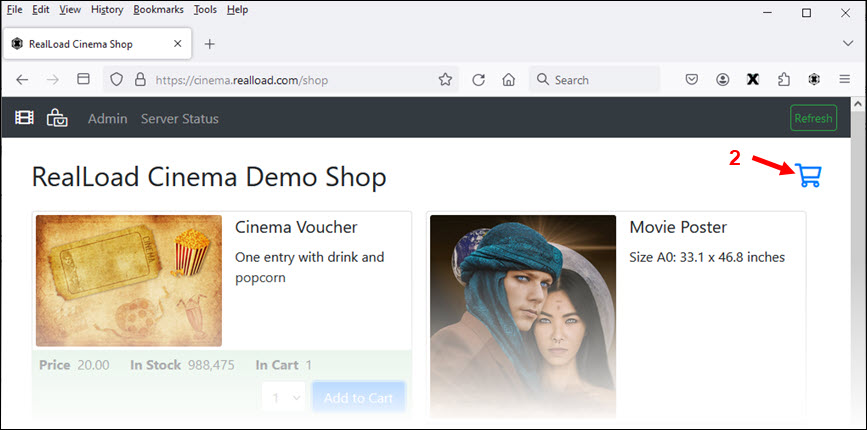
The shopping cart is now displayed. Add another Page Break with the comment ‘Checkout and Pay’, and then click ‘Checkout and Pay’:
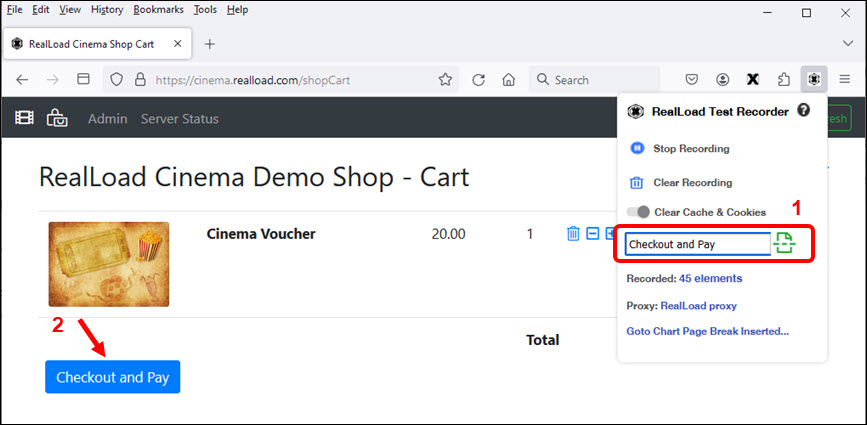
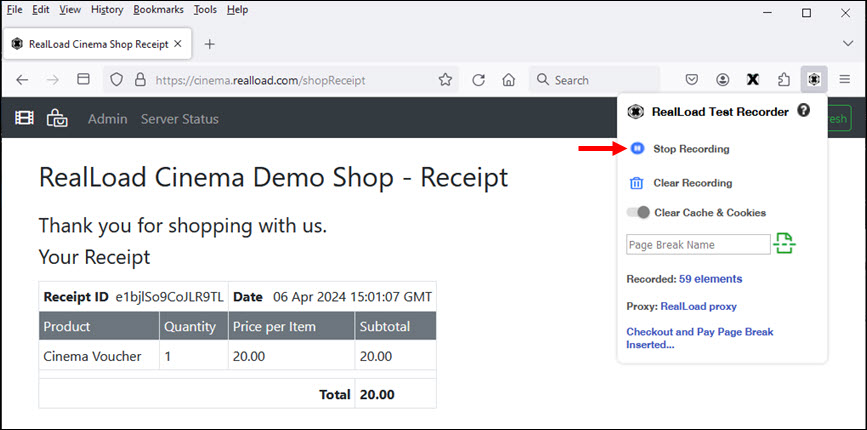
The receipt will be displayed and the recording is now complete.
Tip
As you have seen in the previous steps, a Page Break is always added first before you click on something in the browser or submit a form. This is important because your test and its results are then are divided into individual web pages.In the ‘RealLoad Test Recorder’ browser extension, click Stop Recording:
Now return to the Chrome browser and click on ‘Refresh’. As you can see, a lot of URLs were recorded that were unwanted in your test. Click on URL Filter - Quick Settings to filter out the unwanted URLs:
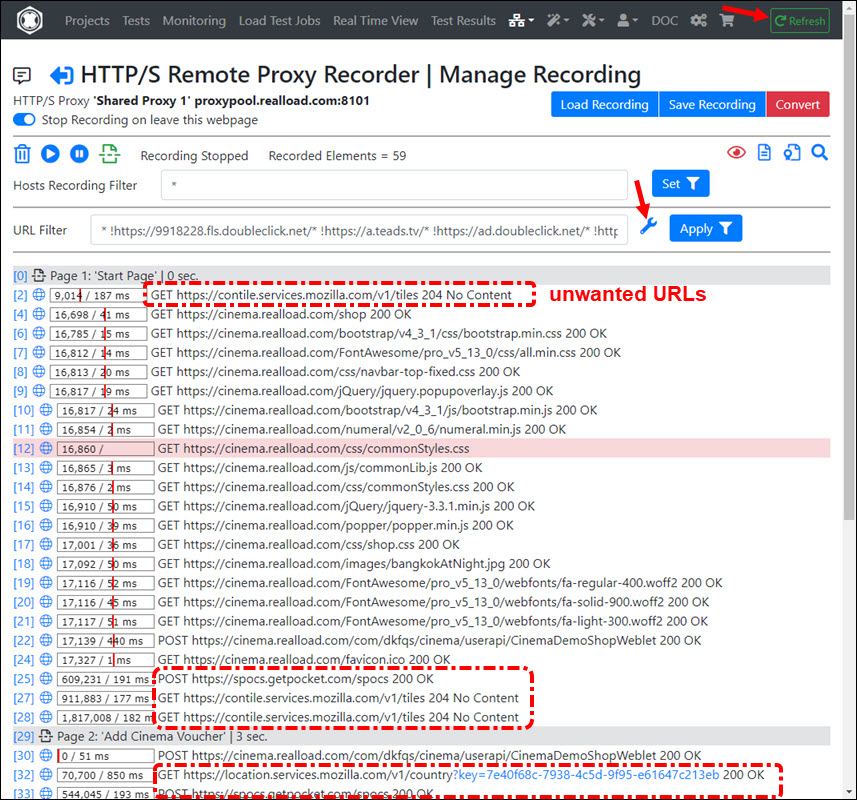
Exclude any web servers that you do not want to be part of your test. In particular, you should exclude any tracking servers.
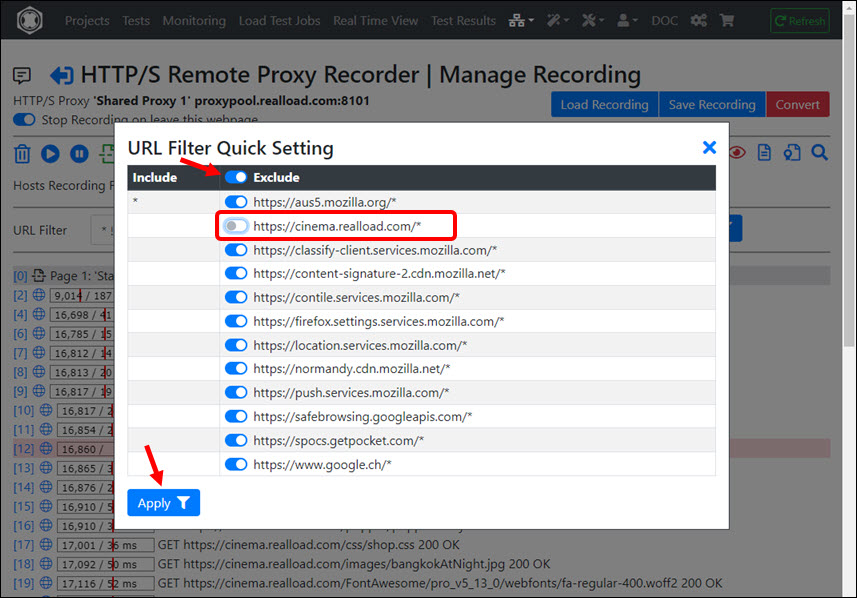
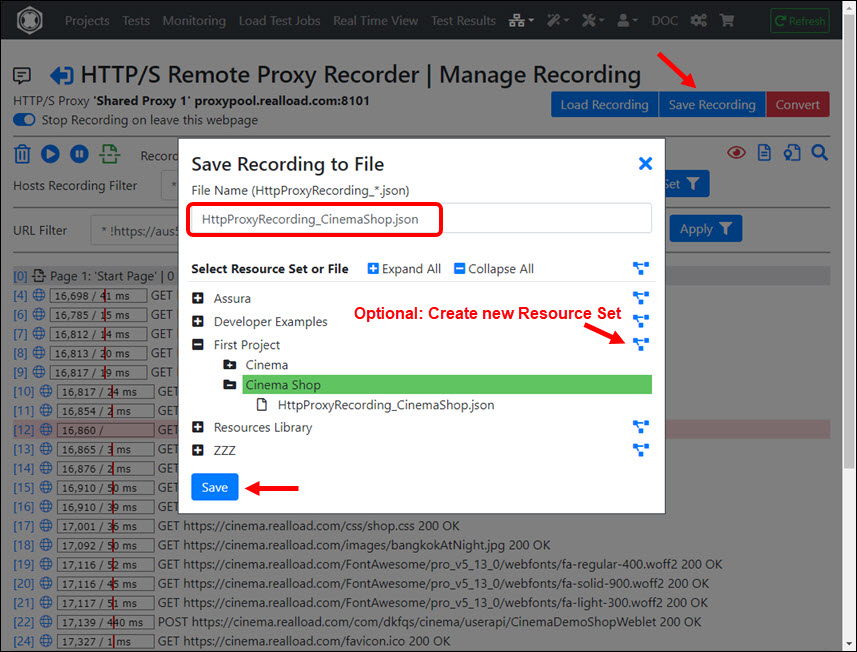
Then save the recorded session. You can later re-load the recorded session to (any) proxy recorder and filter it again:
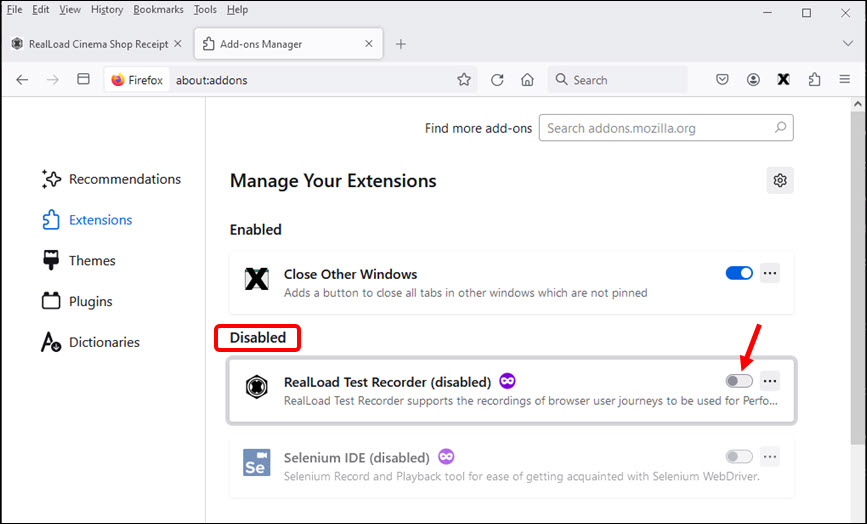
After completing the recording, it is strongly recommended to switch off the ‘RealLoad Test Recorder’ browser extension. Only turn this browser extension on again when you record a new web surfing session.
Converting the Recording to an HTTP Test Wizard Session
In the HTTP/S Remote Proxy Recorder click ‘Convert’
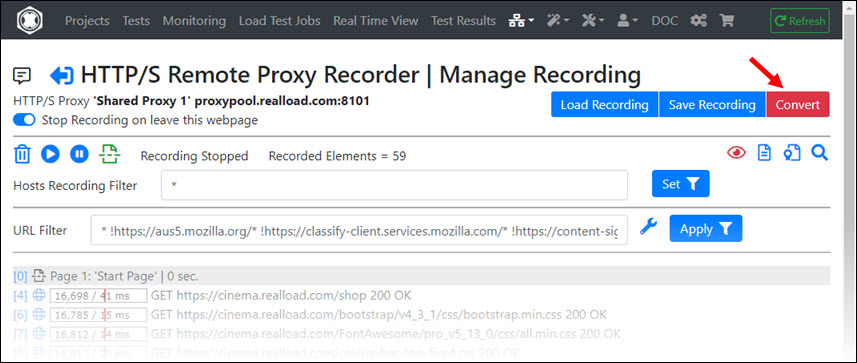
Enter the Headline of the HTTP Test Wizard session (in this case ‘Purchase Cinema Voucher’) and click ‘Convert’:
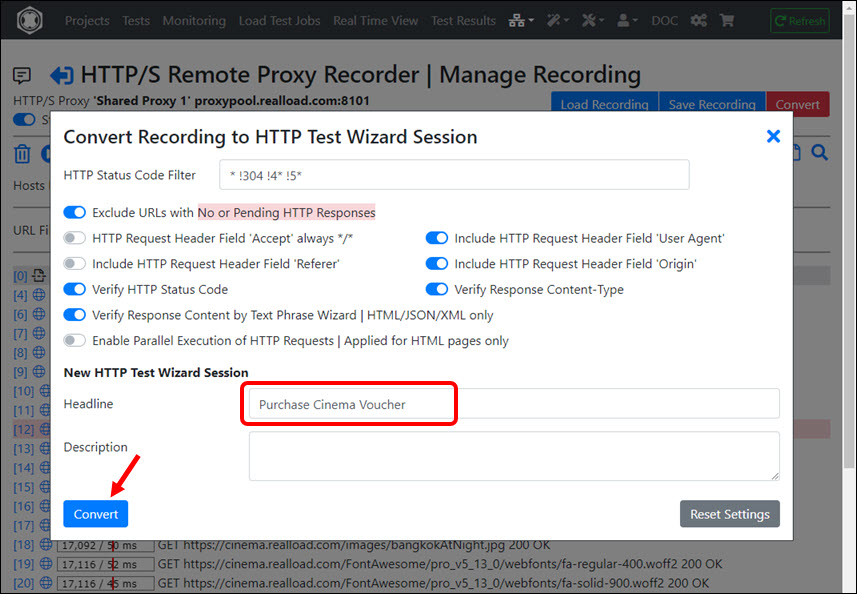
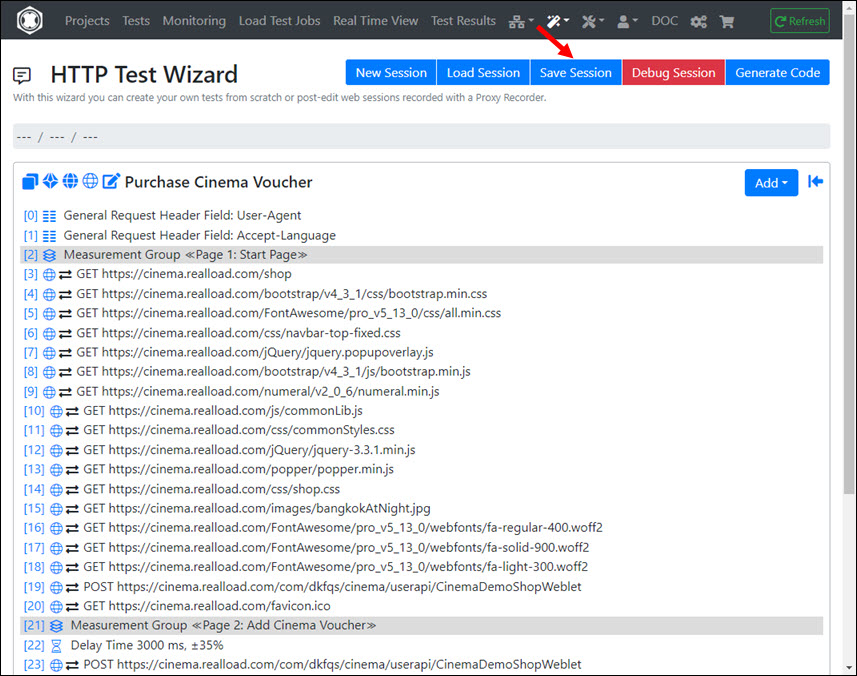
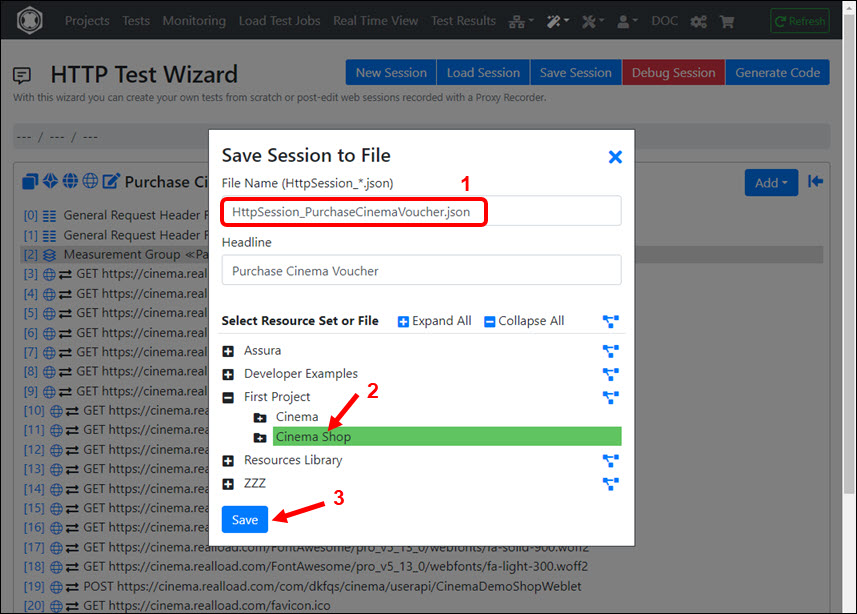
The recording will now be converted and appears in the HTTP Test Wizard. We recommend that you save the HTTP Test Wizard session first before you start post-processing.
Post-Processing of the HTTP Test Wizard Session
Handling of Dynamic Session Values
If a dynamic value such as a order number is part of an HTTP response, and that value is then used in subsequent HTTP requests, you must handle this value using a dynamic session variable.
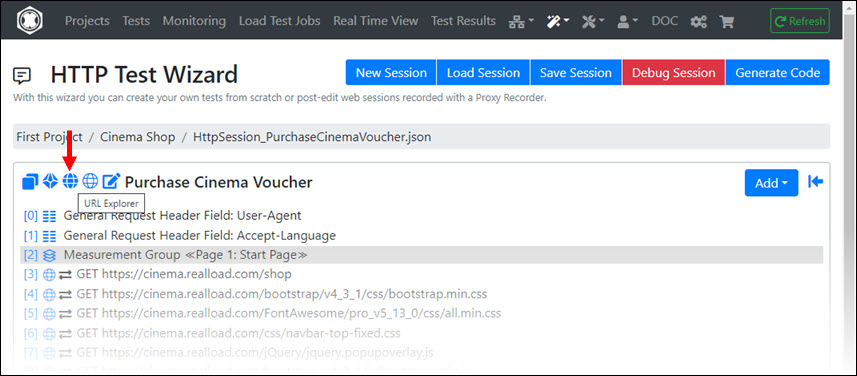
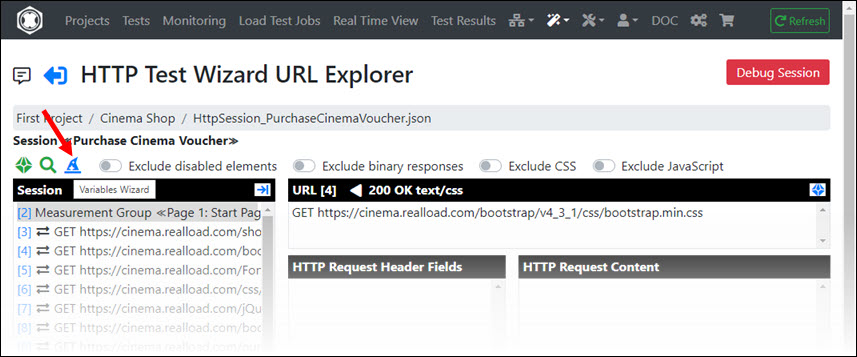
To identify such dynamic values, you can use the Variables Wizard, which you can access via the HTTP Test Wizard. First click on URL Explorer
Then in the URL Explorer click Variables Wizard
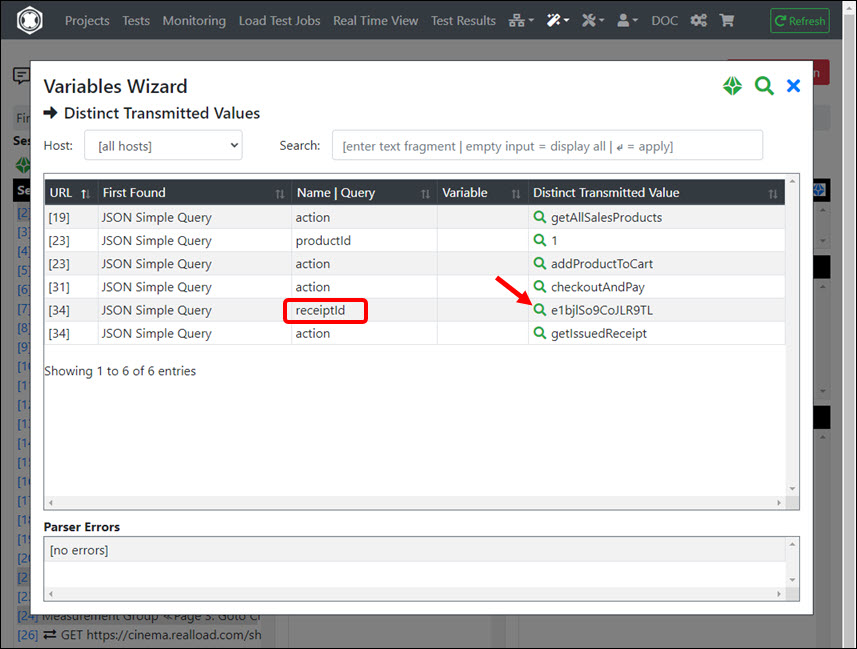
Now a list of Distinct Transmitted Values is shown in the Variables Wizard, which is extracted from all HTTP request of the session. The challenge now is to estimate which of these values are dynamic (static values do not need to be handled).
As a rule of thumb:
- if the value is a simple speaking word, or a combination of simple speaking words, or a small number, it is probably a static value.
- However, if the value is a complex, random string, it is probably a dynamic value.
In the image below there is only one dynamic value (receiptId = e1bjlSo9CoJLR9TL). Click on the magnifying glass icon to handle this value:
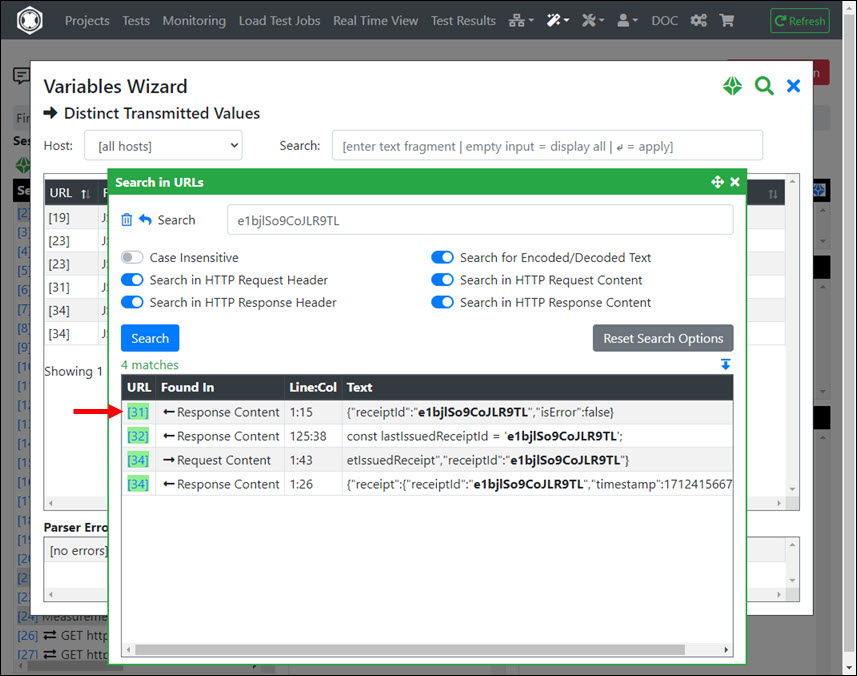
The session is now searched for this dynamic value e1bjlSo9CoJLR9TL. Click on the first search result of an HTTP response:
In this example, the HTTP response is in JSON data format. So click on the JSON tab:
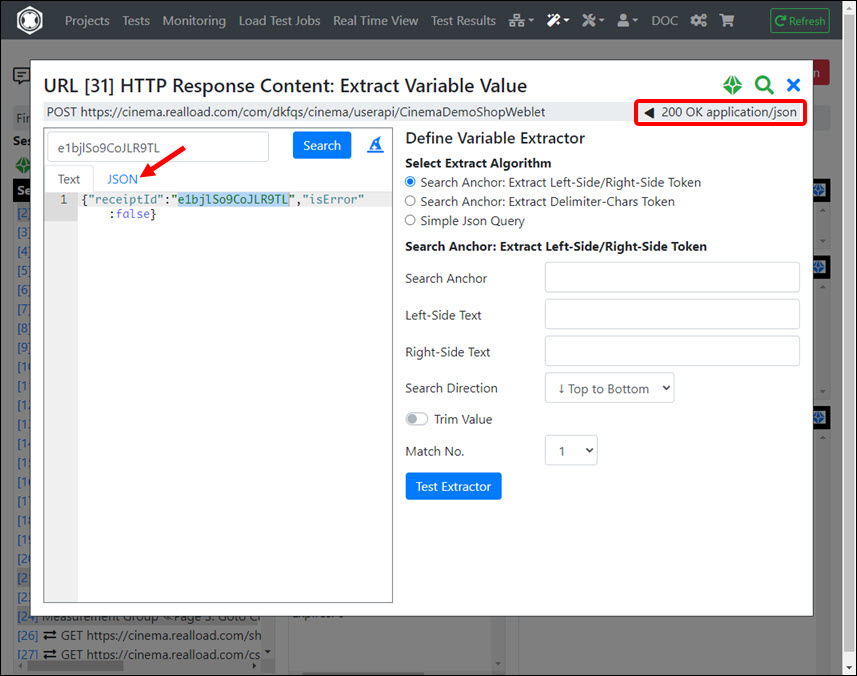
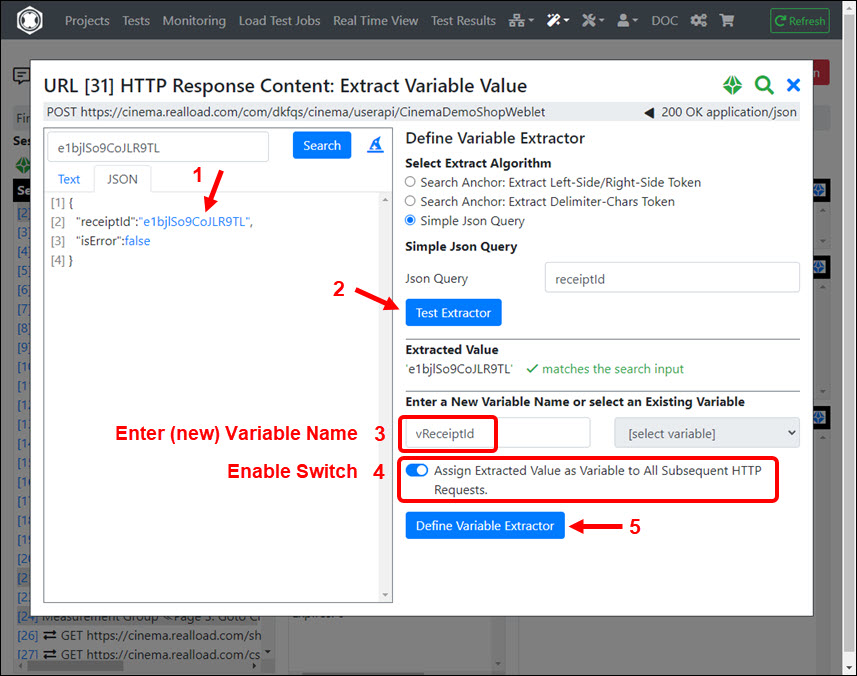
Then click on the value of receiptId, and then click Test Extractor and enter a new Variable Name ‘(vReceiptId’ in this case). Finally enable the switch Assign Extracted Value as Variable to All Subsequent HTTP Requests and click the Define Variable Extractor button.
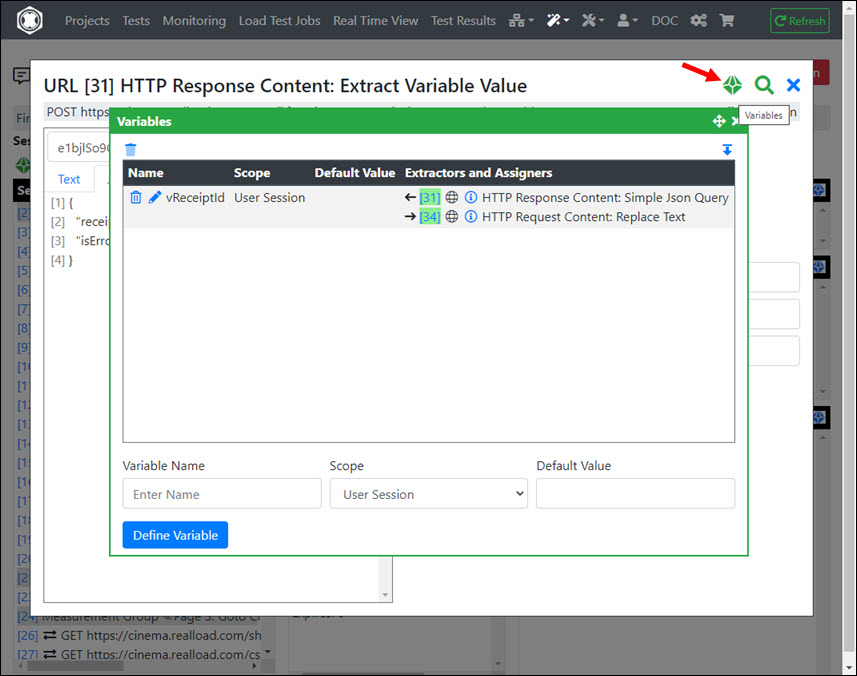
The handling of the dynamic session variable is now complete. Click the ‘Variables’ icon to check the variable extractor and variable assigners:
After you have processed all dynamic values, you should save the session again.
Reviewing the HTTP Response Content Validations
When the recording was converted, the verification of the HTTP responses were also automatically configured.
The received HTTP status code of each URL is always checked for the value it had at the time of recording. However, some URLs may also be automatically configured to additionally validate the response content against a text fragment. You should review these URL-specific text fragments and correct them if necessary.
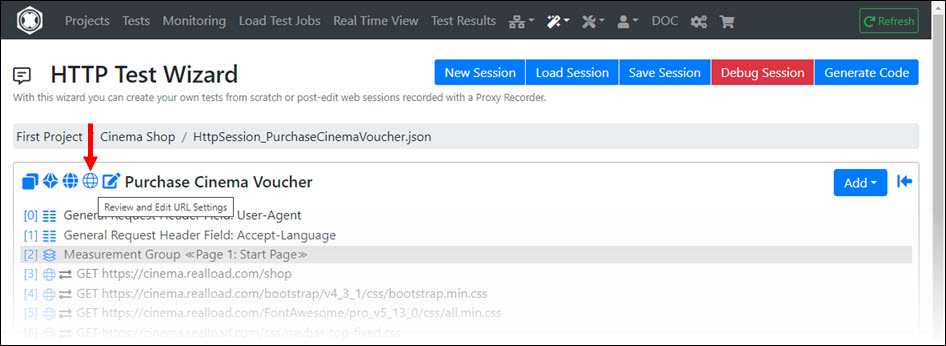
In the HTTP Test Wizard click on Review and Edit URL Settings
Take a look at table column ‘V. Text’ and click on the text fragment wizard icons:
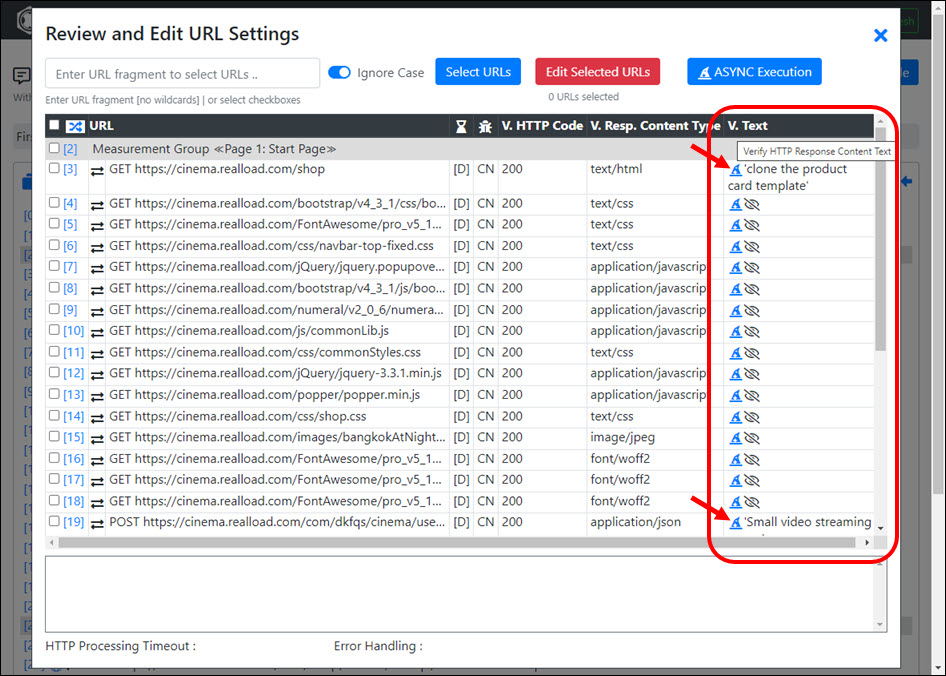
For example, for the URL https://cinema.realload.com/shop, it is better to choose the text fragment ‘RealLoad Cinema Demo Shop’ instead of ‘clone the product card template’:
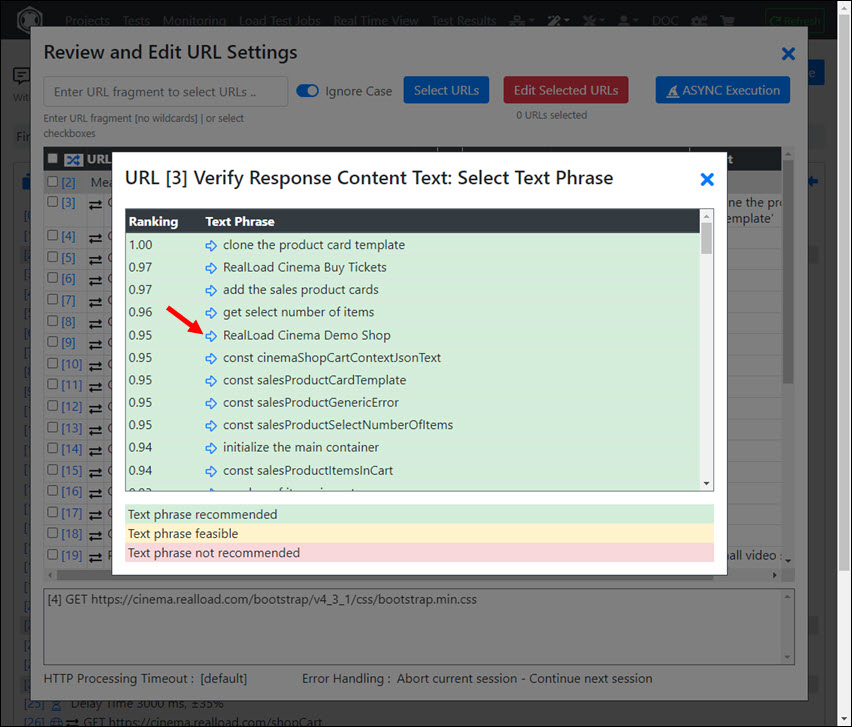
After you have reviewed the content validations of the HTTP responses, you should save the session again - if you have made any changes.
Debugging an HTTP Test Wizard Session
After you have completed the post-processing, we recommend that you debug the HTTP Test Wizard session.
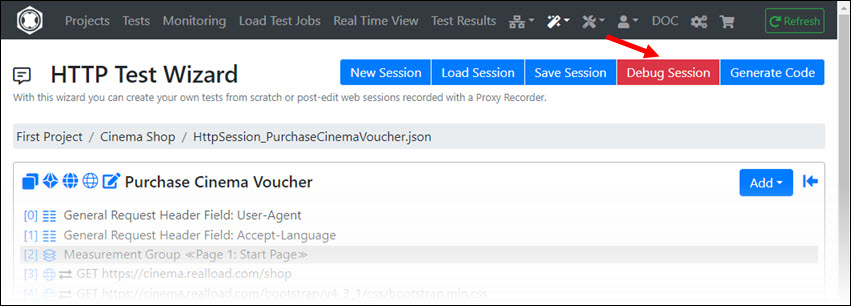
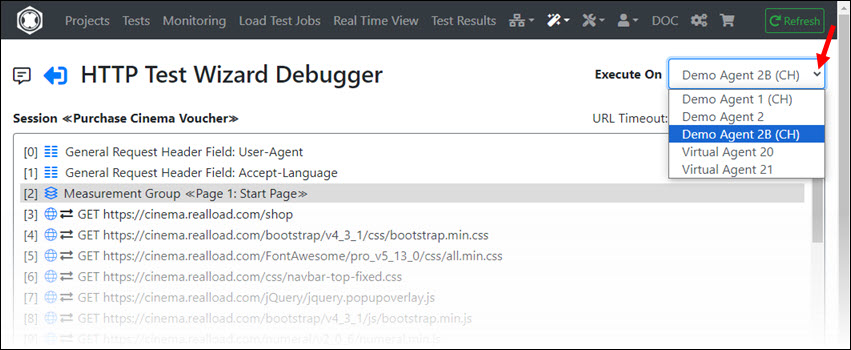
Since this is a Remote Debugger, you can choose which Measuring Agent the debugger runs on. This means you can also debug the session from different geographical locations.
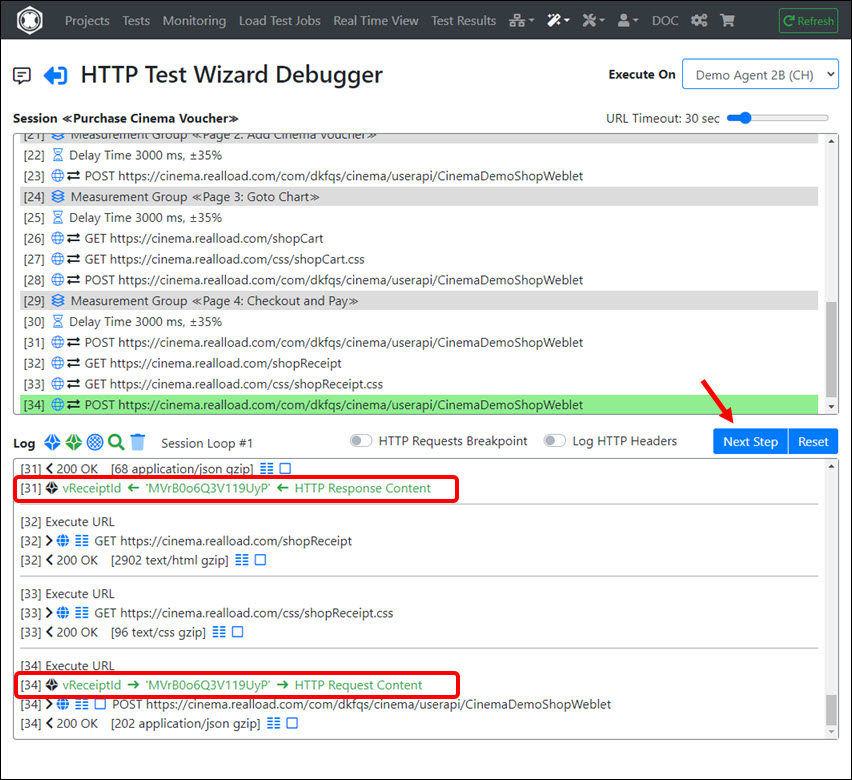
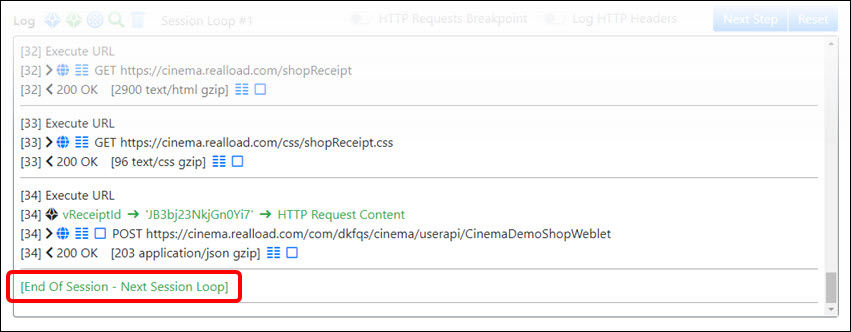
Click on ‘Next Step’ until you reach the end of the session - or until an error is displayed. During debugging you will also see when the value of dynamic session variable is extracted from an HTTP response and when it is assigned to an HTTP request.
Generating a RealLoad ‘Test’ from an HTTP Test Wizard Session
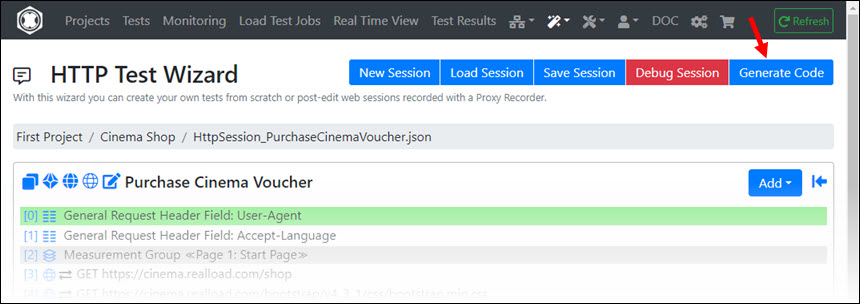
If you were able to debug the session without errors, you can now generate a RealLoad Test from it. Click on ‘Generate Code’:
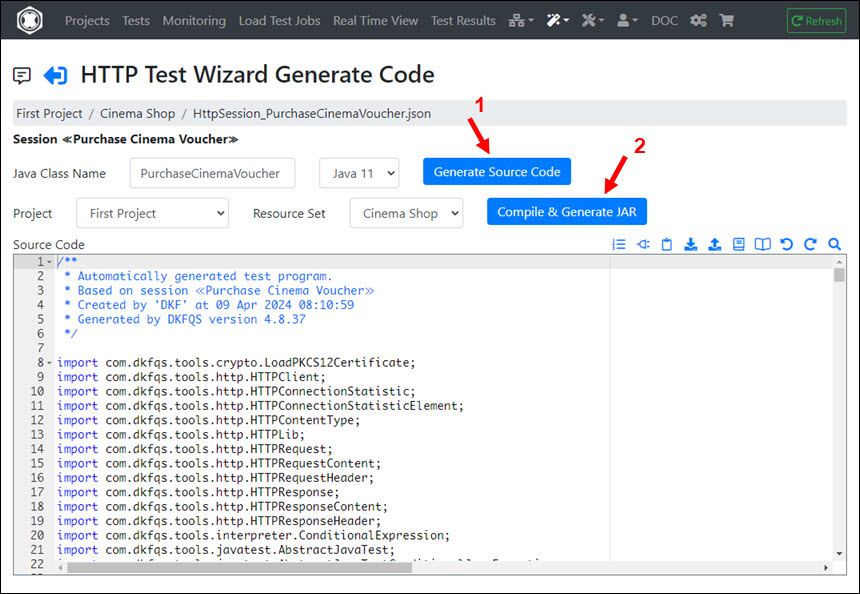
First click on ‘Generate Source Code’ and then on ‘Compile & Generate JAR’:
Then click ‘Define New Test’:
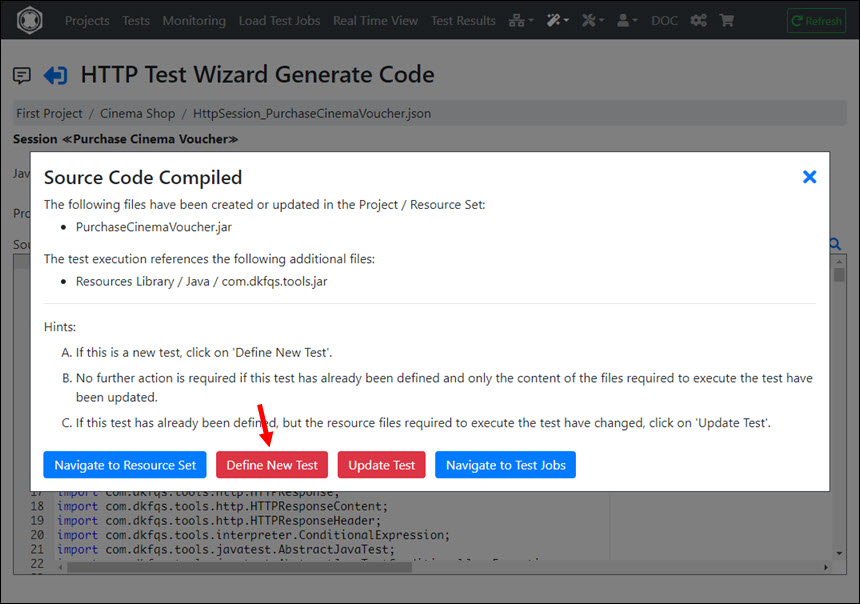
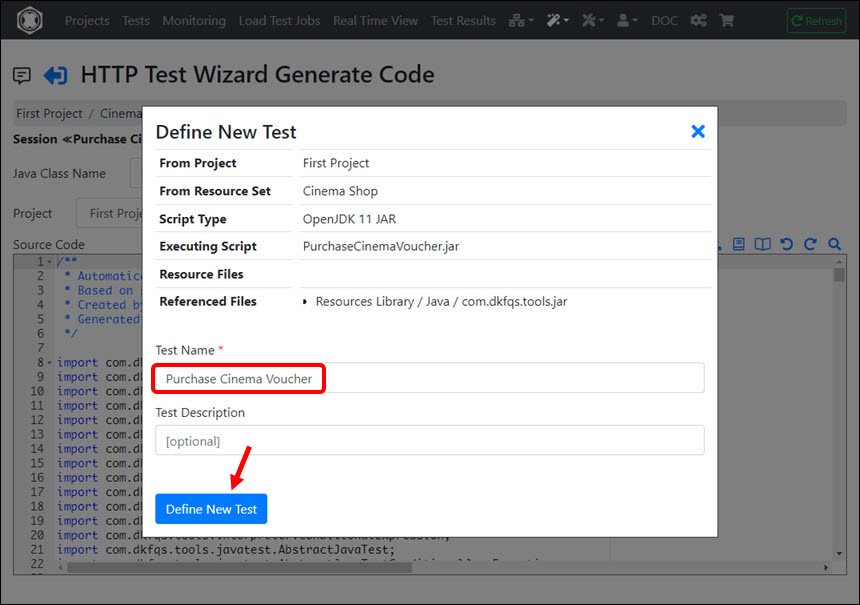
You can adjust the name of the test a little (it can also contain spaces). Then click on ‘Define New Test’:
Your browser will now be redirected to the ‘Tests’ menu and the test will appear at first position (if the sorting is set to descending test ID).
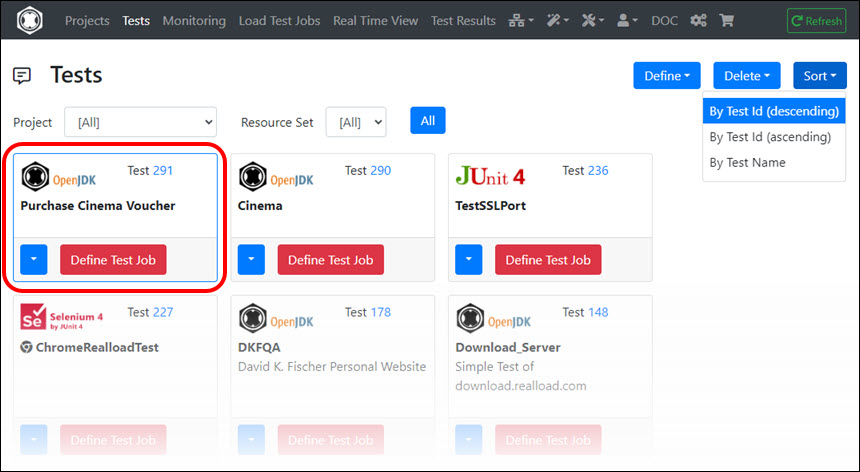
From here you can continue as described at the Tests Menu.